Labels

BASS (50) COMPRESSION (32) DRUMS (45) EFFECTS (49) EQUALIZATION (30) GUITAR (112) HOME RECORDING (95) IMPULSES (21) INTERVIEWS (19) KARAOKE (1) LIVE (10) MASTERING (61) MIDI (21) MIXING (179) REVIEWS (156) SAMPLES (69) SONGWRITING (19) SYNTH (3) VOCALS (31)

Monday, December 26, 2016

In - Out level matching when mixing and mastering


Hello everyone and welcome to this week's article!
Today we're going to talk about a topic related to psychoacoustics: if we eq or compress a sound making it louder, somehow, regardless if it's actually better or not, it will probably sound better to us. 

That's why people usually starts mixing at -15db, and once the sounds of all instruments are done and balanced, the peak in the mix buss is -5db: because we tweak one track to make it sound better and it ends up being louder, and then to compensate we rise the volume on the others, then we pass on the next one and make it louder, and then rise all the others... and so on... and then eventually before mastering we turn the master volume down when exporting like real cheapos.

The experienced producers can start with a chosen project level (for example -12db) and arrive at the end of the mixing phase without touching the master fader with the maximum peak still at -12db, because they did level matching when mixing, and they have kept the volumes of the single tracks at the same level of the balancing phase, thus preserving all the headroom of the project for the mastering phase.

Why not to just turn down the master fader at the end, e.g. 10db down to create headroom for the mastering phase? Because this way we will just raise the noise level 10db in our tracks, since the noise point is always there, in the same place, therefore if we sink the whole project 10db lower, it will eat up 10db of signal, the final result will sound dirtier and data will be lost for no reason.

What to do to keep the level of the tracks stable? 
Match the in-out level when mixing or mastering, both when using Equalization and Compression.
While we have seen already how to do with compression, we haven't yet talked about the equalization; on an equalizer like the Pro Tools one (as you can see from the picture on top) you can monitor the level of input and output signal, which means that for every db of boost that we apply on the sound we can lower the overall output knob of the plugin in order to match the same level of input: this way we will avoid the process of raising and raising the volume of all the tracks that I have already mentioned.
If we don't have the input and output level in the plugin ui, we must use the track metering tool: we must see how loud is the signal with the plugin bypassed and compare it to how loud it is with the eq on: if with the equalizer on the signal is louder, we should lower the output of the plugin until it matches the loudness of the bypassed one.

Once the tone balancing phase and the tone shaping phase with compressors and equalizers are done, in theory the additional processors that we can add to our mix (like modulation effects) shouldn't impact much on the level of the single tracks, therefore we should be quite safe not to raise too much the volume of our single tracks (watch out for the group tracks and the mix buss though!).


Merry Christmas and Happy new Year from Guitar Nerding Blog!


Become fan of this blog on Facebook! Share it and contact us to collaborate!!

Saturday, December 17, 2016

Review: Fabfilter Pro-C 2


Hello and welcome to this week's article!
Today we are going to talk about the new version of a plugin we already know: the Fabfilter Pro-C 2.
I have already praised Fabfilter in many occasions for being a company that has understood better than others what modern producers need: instead of proposing dozens of different compressors, equalizers and so on they just focus on creating one tool (one single compressor, one single equalizer...), abandoning any scheumorphism and offering a clean, modern interface with more features that any competitor, but also intuitive and at a good price.

Talking about interface, this new version of Pro C shows an amazing versatility: there are 3 modes, a compact one that just shows the controls of a classic compressor (and that in my case has everything I need to work comfortably), the medium one which shows several real time metering tools and a full screen one that relies also on the computational power of the gpu, so that our daw interface will be clogged only when unavoidable.

Among the other interesting new features is the side chain, that offers an equalizer to choose surgically with what frequency trigger the compression, the functions Hold and Lookahead that lets us choose when and how to apply the set gain reduction parameters, and additional metering tools compared to the first version, which makes finally this plugin also an excellent choice as a mastering compressor.

All these additions are obviously summing up to the features of the original version, making this probably the best compression plugin money can buy today.

Thumbs up!


Specs taken from the Website (only the new features):


- Eight different compression styles, of which five are new in version 2: Vocal, Mastering, Bus, Punch and Pumping (NEW)

- Side-chain EQ section, with customizable HP and LP filters, plus an additional freely adjustable filter (NEW)

- Smooth lookahead (up to 20 ms), which can be enabled/disabled to ensure zero latency processing (NEW)

- Hold (up to 500 ms) (NEW)

- Custom knee, variable from hard knee to a 72 dB soft knee (to enable saturation-like effects) (NEW)

- Up to 4x oversampling (NEW)

- Audition Triggering option, which enables users to hear on which parts of the audio Pro-C 2 is triggering and how much compression is taking place (NEW)

- Multiple interface sizes: Small, Medium and Large (NEW)

- Range setting, which limits the maximum applied gain change (NEW)
- Mix setting, which scales the gain change from 0% to 200% (NEW)
- Accurate, large level and gain change meters, with peak and loudness level visualization. The loudness level complies with the Momentary mode of the EBU R128 / ITU-R 1770 standards (NEW)

- Optional MIDI triggering (NEW)


Become fan of this blog on Facebook! Share it and contact us to collaborate!!

Saturday, December 10, 2016

How to create guitar cab impulses from a song (free plugins and IR included!) PART 2/2


CLICK HERE TO READ PART 1/2

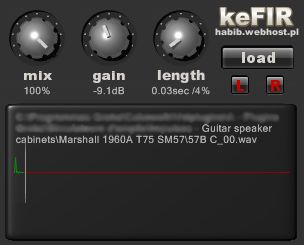
This happens because our impulse is too long, so what we need to do is to make it a little shorter, until it is half a second to one second (or even shorter: you will need 3 or 4 tries before get the right lenght, because it varies from impulse to impulse according to how dry we want our sound to be), and let's load an eq on its vst slot: since we are dealing with a produced and mastered song it will probably have certain frequences a little over-emphasized, so it's a very good idea to set a high pass filter starting from 50 to 100hz, and a low pass one at around 10khz. This way we will tame the excessive low end and some unwanted fizz in the high area.
An additional check that can be done is to compare the volume of our impulse response with others and see if it's clipping, if it's too high, or it's too low, and adjust it accordingly.

5) Now let's put this track in solo, export it in mono again, load it again in the cab simulator in our project and let's play again some riff with our guitar. Does our impulse still need some tweaking? If so, let's adjust lenght and/or eq again and repeat this operation until the sound is as close as possible to the original album, then save it with the name of the song and soon you will have a personal impulse library with the guitar tone your favourite songs!

Additional awesomeness: I have explained the simpliest version of how to clone a guitar tone to turn it into an impulse, but the truth is that there it would be so much more to say.
If you want to dig deeper into this world and for example fine tune furthermore the impulse you can also use an eq matching program to fine tune and copy even more the eq curve by following the procedure explained in this tutorial, this way you would combine two different cloning techniques into one.
Some producer also like to copy the overall response of a vst chain (or part of it), whether we are talking about a guitar, or a snare mixer channel, or a kick and so on, and use it in future projects to clone a certain tone print (this is also the way in which some vintage hardware modeler work), so the concept of impulse responses could be scaled in almost every aspect of our mix, but this is another story.


This sample impulse has been created based on one of my favourite guitar sounds of all times: Clenching the fists of Dissent from Machine Head.
I have tried it with TSE X50 II (but any other Peavey 5150 sim like the TSE X50 or the Nick Crow 8505 with a Tube Screamer as a booster in front should do), fiddling a bit with the eq and using the learn mode for input, and ROSEN DIGITAL PULSE as cabinet simulator.

Let me know what you think about it!

IMPULSE: MACHINE HEAD - CLENCHING THE FISTS OF DISSENT

Happy 5th birthday, Guitar Nerding Blog!


CLICK HERE TO READ PART 1/2


Become fan of this blog on Facebook! Share it and contact us to collaborate!!

Saturday, December 3, 2016

How to create guitar cab impulses from a song (free plugins and IR included!) PART 1/2


Hello everyone and welcome to this week's article!

To celebrate the first 5 years of Guitar Nerding Blog we are presenting you a juicy 2 parts tutorial!
Today we are going to learn how to create a guitar cab impulse response (or IR, click here and here for two dedicated articles on how to use them) starting from a song we love. 
The idea is to take a part of the song in which you can hear only the guitar, clone it and turn it into a convolution impulse, then load it into a cabinet simulator and use it with our favourite amp simulator, to get a result as close as possible to the original one.

Small premise: this method doesn't guarantee miracles, but in order to get really close to the sound we want to copy we should do a little research: using a the type of guitar, string gauge, tuning and pickups similar to the one the guitarist has played on that album, can make a lot of difference.

1) What we need is the free version of Voxengo Deconvolver, a standalone software produced by Voxengo that does everything we need also in the demo version, so we don't actually need the paid one.
We open it, and from the main interface press the Test Tone Gen button and save somewhere the generated wave file.

2) Now we need to open our Daw and load the song we want to copy. What we need is a song with a part in which you can hear only the guitar playing. We cut this part, even if it's just 10 seconds, and export it to 24 bit and 44khz mono, without touching the volume.

3) Let's open again Voxengo Deconvolver, load the generated test tone file in the first slot, the exported sample from your favourite song in the second one, choose the output folder and tick the 2 boxes "MP Transform" and "Normalize to -0.3 dBFS". Then let's click to Process and export our file.

4) What we have here is the raw impulse taken from our favourite song, which needs to be refined: let's create two new mono tracks: one in which we will import our impulse, and another one in which to load a guitar amp simulator that emulates some amplifier similar to the gear of the guitar player of the song, let's deactivate from it (if present) the internal cab simulator and load an external cab sim, and load our fresh impulse inside of it.
Let's try our sound: chances are that it will sound like we're playing in a cathedral, with the sound soaked in reverb.


CLICK HERE TO READ PART 2/2


Become fan of this blog on Facebook! Share it and contact us to collaborate!!