Labels

BASS (50) COMPRESSION (32) DRUMS (45) EFFECTS (49) EQUALIZATION (30) GUITAR (112) HOME RECORDING (95) IMPULSES (21) INTERVIEWS (19) KARAOKE (1) LIVE (10) MASTERING (61) MIDI (21) MIXING (179) REVIEWS (156) SAMPLES (69) SONGWRITING (19) SYNTH (3) VOCALS (31)

Saturday, December 27, 2014

How to use a De-esser (or Deesser), with Free Vst Plugins!


Hello and welcome to this week's article!
Today we are going to talk about de-essers!
A deesser is basically a compressor which is set to operate only on a very narrow range of frequences that corresponds to the sibilants of the human voice, which can be captured with high peaks of volume by the microphones.
Usually these sibilant "S" and "T" sounds are located in an area between the 9khz and the 15khz, and often the deessers have presets for male or female vocals, but the best ones sometimes features also a "learn" mode in which they automatically detects the right area to attenuate: the more the area is narrow, the more the deesser will be effective without processing unneeded areas of the mix.

There are also other, more creative ways to use a deesser: someone uses them on a cymbals track or on a distorted guitar track to tame the harsh frequences that sometimes can get a bit too prominent, giving a more smooth result, similar to the one you'd get from a Low-pass filter, but less invasive.

There are many Deessers on the market, and almost every DAW has one bundled, but if you want to try some free Vst, here are best ones the web has to offer:

Digitalfishphones Spitfish - Considered one of the best deesser ever made

Tonmann Deesser - One of the most transparent free deesser around

Sleepy-Time Lisp Deesser - A very good Deesser, available also in 64bit version

Antress Modern Deesser - An interesting rack-like deesser


Become fan of this blog on Facebook! Share it and contact us to collaborate!!

Saturday, December 20, 2014

Review and Tutorial: Fabfilter PRO C


Hello everyone and welcome to this week's article!
Today we're going to talk about another Fabfilter product, the Pro C Compressor.
By now, after all the articles I've done, we all should know what a compressor is and how does it work: basically it's an automatic volume control that lowers the lowest peaks according to how we set it, and raises the quieter parts.

Plus it's an important tone shaping tool.

I have particularly liked this specific compressor because of its flexibility, which is similar to the Pro Q 2's: the interface is clean, easy, and at the same time there are tools to visually monitor what's going on that usually are not featured on other processors of this kind: I'm talking about the dual graph:

- the left one is pretty common on many compressors, and tells us when and how strong the compressor kicks in, and it is possible to choose between a soft and a hard knee.

- the right one is less common and it shows us 3 things: the original waveform, the amount of gain reduction we're applying, and the new waveform. This helps us a lot checking out if we're crushing the dynamics of our track too much, or on the contrary if the settings we're applying are uneffective.
The last part of the graph is a metering tool that tells us the level of our track and the gain reduction applied.

Beside the common controls that we can find on any other compressor (attack, release, ratio..), the Fabfilter Pro C features also some less common function:

- Automatic Release control, that changes adaptively according the part, and that is particularly useful if used on complex tracks

- Automatic Make up Gain to compensate the usual loss in volume due to the compression

- 3 Modes: Clean, Classic and Opto, which reacts differently, since they're modeled on different types of compressors.

- the A/B comparison function: we can set the compressor with two different settings and a/b compare them to choose the best one.

- the Parallel Compression function: we can experiment using some more extreme setting on our track, and then use the Dry Mix control to decide the amount of dry signal to blend with the processed one. This way we can add some body to the track leaving part of the transient to pass through uncompressed. This is particularly good with a snare drum, to keep the snap (the transient) intact, or with a whole drum buss.

- a Sidechain Function in which we can decide wether to use separated left and right gain control, or to use it Mid/side.

- a Midi Learn function to automate the settings: we need to push the Learn button, then move the knobs we want in real time while the song is playing, and the Pro C will record our movements and change the settings real time the same way we did, automatically.

There are even more functions to talk about (for example this plugin can be used as an effective Deesser too), and many presets to choose from, but it's already enough to say safely that this is the most complete Compressor ever made, and one of the most transparent sounding ones, too.


Become fan of this blog on Facebook! Share it and contact us to collaborate!!

Saturday, December 13, 2014

How to record and mix clean guitar (with free Vst Plugins)


Hello and welcome to this week's article!
Today we're back with our mixing tutorials, and we'll see how to record and mix a clean guitar.
There are many ways to record a clean guitar, and many definitions of a "clean" tone, for example we could define "clean" the sound of an acoustic guitar (click here for a tutorial about how to mix an acoustic guitar), but today we will focus on how to how to mix a clean tone from an electric one.

First off let's say that we can track a clean guitar tone both Microphoning an amp (click here for a tutorial about how to mic an amp) or going straight to the audio interface, and we can do this directly from the guitar to the interface, or we can go from the line out of an amplifier, so that we can use the preamp sound, to the send of the audio interface, bypassing the interface preamp.

If we're going straight to the audio interface, the idea is to record on a stereo track if our clean guitar track will not be double tracked and it will be set dead center;
if we are recording two different takes instead, one to be played on the left side and one on the right one, we should use two mono tracks.
Plus, if we're going straight from the guitar to the interface, we should use a Vst Amp simulator, for example the free Ignite NRR-1, which has a beautiful clean channel, and then we can choose wether to use a cabinet simulator or not: unlike what happens with distorted guitars, for clean guitars a cabinet simulator is not mandatory, the same way is not mandatory for D.I. Bass.

Once we have tracked a good tone (the better it is at the source, the less we will have to process it later), we can add some stereo widening (if we have recorded a single track in stereo), to make it sound a bit more large in the soundscape, then is time to use some equalization: the idea is to use a high pass filter, not too invasive, to get rid of the unnecessary lows (for example we can roll off from 60-to 100hz), then we can add some snap around 2500hz and sometimes, if needed, some "air" in the 7,5-12khz area.
Remember, though, that if a correction can be done with the real or virtual amp controls, is better to fix it that way instead of using the vst equalizer: the sound will mantain its realism much more.
Next step: Compression.
The settings of the compressor vary according to the music genre we're mixing: if we're mixing a song with just few notes resonating we won't need a lot of compression, a 2:1 to 4:1 ratio should do the trick, but if we're mixing fast strumming music, such as funky, the levels must be kept even all the time, so we can go up to a 12:1 ratio to keep the performance stable.
Last link of the chain: Reverb.
As for all effects, we should use them with taste, otherwise we would screw up all the work done until now.
The reverb should have a short tail, and we should carefully set the "wet/dry" ratio, in order to give weight and space to the sound without making it drown on it.

If needed, clean guitar accepts processing with modulation effects very well, so we can use a bit of Chorus to add a vibe similar to Metallica or Pink Floyd classic clean sound, a Delay to obtain a U2 sounding guitar, some Tremolo to add a bit of western mood, and so on.

Signal Chain: SOURCE -> (STEREO WIDENER) -> EQUALIZATION -> COMPRESSION -> REVERB -> (OTHER EFFECTS)


Become fan of this blog on Facebook! Share it and contact us to collaborate!!

Saturday, December 6, 2014

Review and Tutorial: Fabfilter PRO Q 2


Hello and welcome to this week's article!
Today we're going to talk about my to-go Eq Vst plugin, the Fabfilter Pro Q 2, which is basically nowadays the only Equalizer I use, both in the Mixing and in the Mastering phase.

Why do I think this Eq is better than the others?
Apart from the fact that it sounds good and it doesn't colour my source sounds too much (but this is a characteristic that many good quality Vsts have, for example some of the Waves ones), I love this Eq and I use it on every project because of its unique tools, that makes my job so much easier:

- Built in Spectrum Analizer: it lets you see the original curve and the Post Eq one, even at the same time, to see if there are peaks or resonances to tame.
I don't know of any other Equalizer that gives that much flexibility, so far I had to use at least a Spectrum analizer on each chain, and it has been a pleasure to take 'em out.

- The fact that if you're working on a stereo track (i.e. Mastering), you can have each band to work on the whole track or just on the left or right channel.

- It has an Eq Matching function, much like the Voxengo Curve Eq: you can make it analyze another track via the Sidechain Input, and it will apply the same curve to yours.

- Solo mode: this function allows you to isolate just one "slice" of the spectrum and hear it.
I find this function, which is quite rare, to be the most useful feature in the whole plugin, and it works by clicking and holding down the headophone icon that appears whenever you highlight a single band. You can move left and right to move the "slice" of the curve you're listening to, and use the mouse wheel to make the audible part more wide or more narrow.
This is the best and most precise way to point out a single area of the sound to intervene.

All in all, this plugin makes my tracks sound better and my signal chain shorter, which is very important since the more processors you need to stack on a track to make it sound good, the more problems you will have, and ultimately the more "unnatural" the final result will sound (plus the project will be heavier on the cpu).


Become fan of this blog on Facebook! Share it and contact us to collaborate!!

Saturday, November 29, 2014

Ignite Amps Emissary - Free Guitar Vst Amp Simulator with video sample


Hello everyone and welcome to this week's article! Today we're talking about a really good Free Guitar Amp Simulator Vst, that deserves an article on its own.
Ignite amps is an italian manufacturer which actually builds real amps and stompboxes, both for guitar and bass.

Ignite amps often releases the free vst version of their hardware products, and these plugins are really high quality (click here for the download page), just try the IR-loader NadIr or the bass amp simulator Shb-1.

Today we're focusing on the Emissary plugin, which is considered by some of the mix engineers we've interviewed as the best guitar amp simulator ever made, and that is also used by Bloodtruth's guitar player Stefano as a live guitar amp, going from the computer to a tube power amp, and then to a real cabinet.
The amp is a 2 channel head, with bright and deep switch (only the bright one for the clean channel), which gives more control than the average on the overdrive channel eq by featuring 2 mid controls: Lo Mid and Hi Mid, plus a general Depth and a Presence control.

The sound is very warm, mid-rangey, and it can go from the classic rock/stoner sound to the extreme metal without the real need for an overdrive in front of it.
The sound stays very natural and organic at any setting and is very "mixable", not caricatural as some other guitar amp modelers on the market.

Plus it's free.


Give it a try, you won't regret it!

Become fan of this blog on Facebook! Share it and contact us to collaborate!!

Saturday, November 22, 2014

Interview: Stefano "Saul" Morabito (Eyeconoclast and 16th Cellar Studio)


Stefano "Saul" Morabito is an iconic italian Producer, which has worked with many known extreme metal bands such as Fleshgod Apocalypse, Hour of Penance, Bloodtruth, Devangelic, Subhuman and so on; he is also a talented guitar player, which plays in Eyeconoclast, a thrash-death metal band from Rome (Italy).
Here's our interview:

GuitarNerdingBlog: Hello Stefano and welcome to Guitar Nerding Blog! Introduce yourself to our readers, tell us your story!

StefanoMorabito: Hi, Stefano Morabito here, Nice to be on your blog! 34 years old, Producer/audio engineer at 16th Cellar Studios since 2002 and guitar for Eyeconoclast.

GNB: Tell us about your career. We know you've been playing in many projects during the last few years, and the most important one is obviously Eyeconoclast.
Which are your career highlights? Which are the artists that influenced you the most? Is it there still some collaboration that you wish you would do?
SM: Begun playing guitar in a death metal band called Chthonian Nemeton in 1997, played in Hour Of Penance in 2001, with Rust of Reason in 2003, and from then on, I've been playing guitar in Eyeconoclast. My favourite metal artists of all time are Dan Swanö, The Crown, Dissection, wtf list could be too long let's say basically all swedish death from 1990 to 2000 and a lot of american death metal from the same age :D
My career Highlights with Eyeconoclast have been touring Japan with Septic Flesh and Svart Crown, the best place i've ever been to, there you can see the kind of support you could expect 10, 15 years ago, when everything was new and magic, the people is really interested in your music, and supports bands in a way that is forgotten here. 
Yes, they could download your album, but everyone, and I mean everyone who comes to your show, buys your cd. Japanese people is hungry for metal, and they gave to us so much enthusiasm and will to continue!

GNB: What do you think about the actual music business? What are your thoughts about underground and mainstream music scene nowadays?

SM: Actual music business is based mainly on hype and money. With File sharing everyone has a place, everyone can be heard, which is great, but the downside of this is that there's so much offer than request for music, so: more bands, less quality, and the bands need to invest more on promotion, so money talks here. 
Whoever has more money gets more hype, and buys a bigger place in the heart of fans. 
That's how it works: artistic quality is often found in the second or third place.


GNB: What do you think about the digital music distribution? What about the file sharing? How do you think the music business will evolve in the future? 

SM: File sharing had a bad impact on music business. While it is also true that if there was no file sharing, we probably wouldn't be here speaking: your blog is shared, my music is shared, the works I do in the studio are shared. I think that at the moment we (the music business) are learning how to deal with the good sides and the bad sides of file sharing: music busines at the moment is like a baby who's learning how to deal with a new world, and hopefully someday this situation will reach a balance that will satisfy the companies and the people. At least this seems how it's going.

GNB: Tell us some funny story: which one has been your best/funniest experience as a musician? And your worst one? 

SM: worst one but also funny: Going to play to Stonehenge fest in Holland: Lufthansa air company lost one of our guitars and one of our basses, which arrived 2 flights later, so we were late for the show, we had the driver run like crazy from the airport to the festival, something like 130km/h in a shitty van risking our lives at every turn, then we arrived on stage, plug guitar in and PLAY in front of 1000(ish) people:  here's exactly 5 mins after we took our stuff out of the van ahaha!
The best one was the afterparty after one of the gigs with Cryptopsy, Cattle Decapitation and Decrepit Birth, where Cattle decapitation offered us so much stuff that we were completely out of our mind, the night finished with me, Mauro and Paolo in the streets near the venue doing spanish corrida/bullfight to the passing cars with our jackets, and being asked by the police what we were doing, fortunately they had a laugh about it and everything went good ahah!!! Crazy stuff!

GNB: Since many readers of our blog are mainly interested in the technical side of the guitar world, can you tell us something about your studio and live equipment? Can you tell us about the recordings of your latest album? 

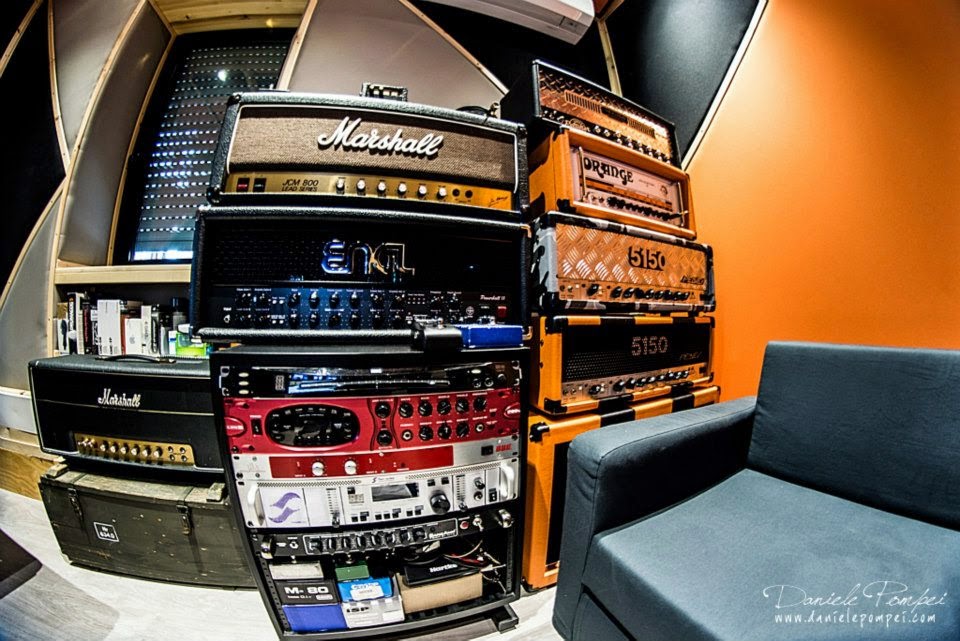
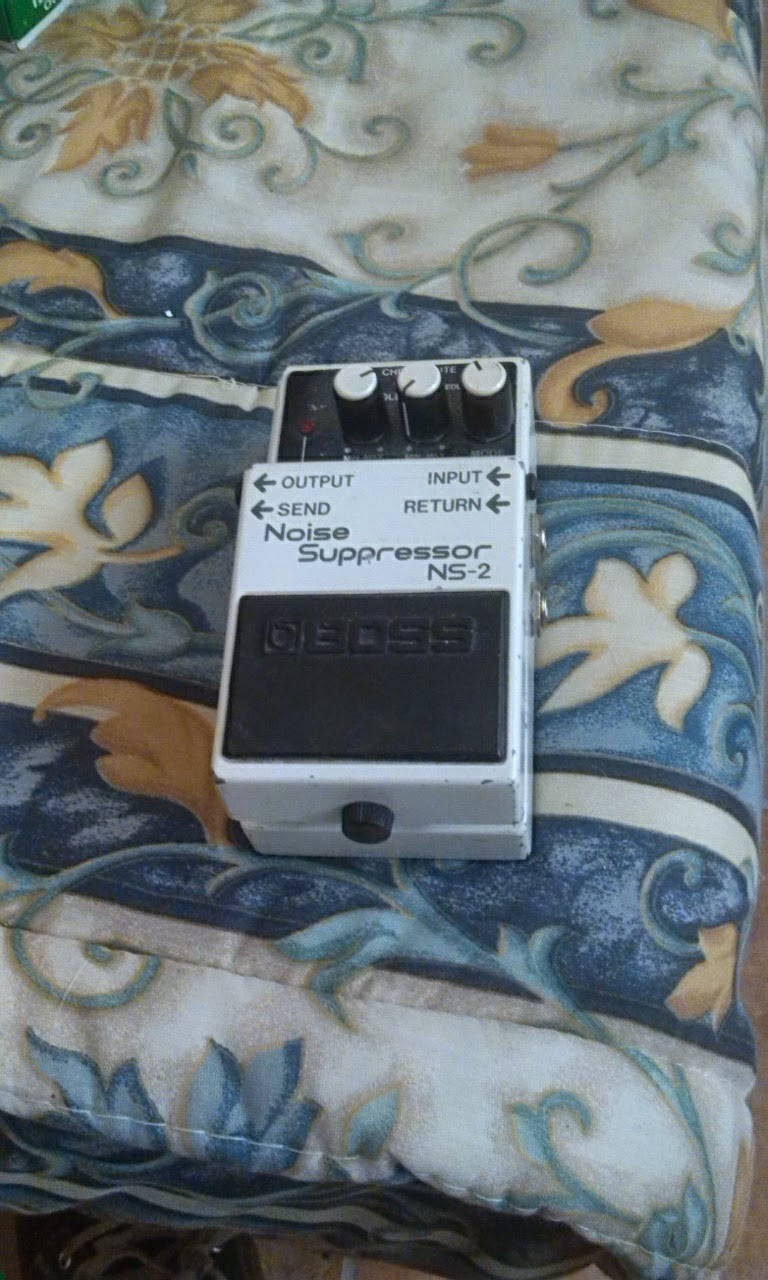
SM: In the studio I have some good amp: Mesa Boogie Dual Rectifier (first version), Peavey 5150, Engl Fireball, Engl Savage, I also own some great OLD Geloso Amps, from Italy (1965) completely refurbished and adapted for guitar. About the cabs, I use a Carvin Legacy loaded with Celestion v30 stripped off from a Mesa cab. This is why the Mesa cab was too bassy, but I liked the mids, so I created this "frankenstein" that I like so much, along with some classic Boss, Ibanez and Maxon pedal; I also have some guitars to choose, a 92' Jackson Dinky reverse loaded with Quad rail pickups, a Schechter Hellraiser loaded with Bare-knuckle Aftermath pickups, an '89 Kramer guitar loaded with Emg81, an Ltd guitar, and some "Overload guitars" an ITALIAN company who makes incredible axes (http://www.overloadguitars.com/) and basses, who basically kill any other competitors when it comes to recording guitars here :)


About the recording of our last album there's not much to say, we wanted it to sound OLD style and raw, like Angel Corpse's "The Inexorable" meeting The Crown's "Hell is Here" album, so drums are completely not triggered at all, except for a minimum on kick drum: we wanted to go in the opposite direction of the standard metal format of today. Quad tracked guitars with Savage and 5150, and lots of headbanging going on ehhehe

GNB: Tell us something about you recording studio (16th Cellar Studio): which Daw do you use? What are your favourite vst plugins? Do you use hardware outboards or you prefer to mix in the box?

SM: Studio is in working business from 2002, I begun in 1998 doing stuff for friends, when Hard disk recording was mostly unknown for the general public, and often seen as a low quality option for recording, (as many of the new technological breakthrough in their early age) in that period ADAT was used. To mix totally outside the box for today's extreme metal is completely unrealistic and unpractical, and very few do it, Just maybe really really big 1 year / >3 months productions , mixing outside the box a project of 60/100 tracks needs a really big mixer, and people who follows the automations by hand when tracks are reversed on the final stereo tracks. What is often and most likely done, is to mix inside the box AND outside the box together, at some degree, for example I often use buss compression on drums with my API 527 compressor, and bass, vocal, acoustic compression with my telefunkens U373a, U373bk, u373S, or my emt 277 dx limiters, old stuff with big punch. 
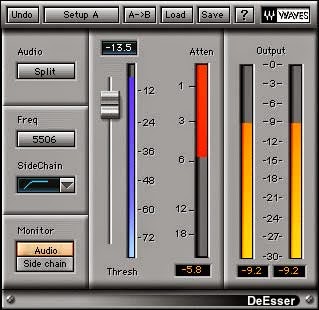
External Insert with delay compensation rules here, and then I take care of the volumes with my Mackie Control Pro, extender pro and c4 pro, or just draw lines to automate stuff. that's a healthier life for sure, eheh. For mic preamps I use Neve 1073 (bass, vocals, kick), Api 512c (snare, guitars, sometimes kick), Telefunken v676, v672 (works well on vocal, bass and toms) and neumann pv46 pres (works wonderfully on cymbals and rooms). On vocals I've found the paradise using Neumann U67 mic, since a year and a half. Favourite VST plugin is the Sonitus: fx Equalizer, a bit old but it is the most precise EVER for me :D

GNB: Let's talk about guitar tone: what is your favourite way to get a good guitar tone? Do you use vst amp simulators or you prefer to mic a cabinet? Have you got any tip to share?
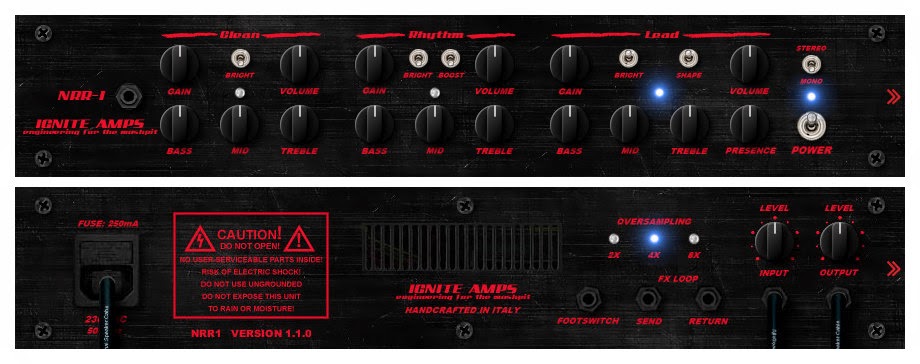
SM: I rarely use any simulators (if not never), for rhythm guitars, maybe I still havent found anything that sounds 100% right to my ears, although in the recent year a good company popped up, making some plugin that works very well, and is ITALIAN, its name is Ignite amps
They also build the real stuff, so they're a step ahead to other simulators, they really know what the hell is going on inside those boxes with lights that produce sound eheh, I used it for the Solos of Bloodshot Dawn, an UK band who came over here 2/3 years ago to record their album, you can check it out here; pretty nice stuff!
Anyway for rhythm guitars I stick to my beloved amps and pedals. Favourite way to get a good guitar tone? Bring with you more guitars than you can and listen carefully to each one, with and without the amp (hi-z), to better understand how each guitar behaves; the one who wins, records the album. 
NEW strings every 2/3 songs Golden rule! Sm57 mixed with another mic of your choice will always be my favourite choice!

GNB: Do you have any advice for the guys that wish to open a recording studio on their own, or to become mixing or mastering engineers?

SM: 1) forget sleep
2) be patient
3) learn psychology
4) never lose passion
5) the project needs FUCKING ORDER dont do a mess with tracks!
6) build your experience day by day, never give anything for granted
7) learn to do things in 10 different ways to have the same result
8) learn from others, even unexperienced people can make you understand important stuff
9) If you have time listen to what others do, there's always a good tip everywhere
10) learn how to repair your own stuff
11) never use presets, begin each project from scratch, otherwise one day you will find that you have produced xx albums which sounds identical to each other
12) be methodic, and Have FUN!!!!


GNB: The interview is over! Tell us about your latest works, projects and tours! Thank you very much and we hope to see you soon live!

SM: Tours with Eyeconoclast are being planned as we speak, hopefully everything will fall in place! We are also planning the third album!! About the studio: You can listen the last Fleshgod Apocalypse's album or the last Hour Of Penance Album (where you can hear the mighty engl fireball roaring on guitars), or the new Hideous Divinity album or the new Bloodtruth album! Too many damn good bands in Italy are around these days!!!
Support the scene, buy albums but most of all: DON'T PLAY SHIT MUSIC. Thanks :D


Become fan of this blog on Facebook! Share it and contact us to collaborate!!

Saturday, November 15, 2014

Review: M-Audio Delta Firewire 410


Hello and welcome to this week's article! 
Today we're reviewing a discontinued product, which was in production until 2010-2012, the most successful firewire device ever produced by M-Audio, before part of the production was acquired from Avid (specifically the Usb audio interfaces).
The M-Audio Delta Firewire 410 features 2 jack/Xlr preamps, 2 line inputs, 8 unbalanced jack outputs, 2 headphone preamps, S/Pdif input and output, Midi Input and output.
This very complete Firewire interface, debuted in the market with a very affordable price (less than 500$ - 350 Uk pounds), and it represented a step forward in professionality for many bedroom producers, since until then, the only manufacturers that produced audio interfaces with those specs were Behringer, Samson and Phonic, two brands known for the cheapness of their components.
M-Audio sets itself one step higher than those three brands, making audio interfaces affordable and at the same time accettable in terms of quality; obviously its preamps cannot be compared with the Apogee ones, and its drivers are not well performing as the Presonus Ones, yet after ten years I still use this interface, today mainly for monitoring purposes, having switched to other devices to acquire the sound.
Today M-Audio, as well as many other producers, is moving away from firewire interfaces, since are dangerous for the motherboard (which can sometimes fry when hot-plugging), and since Usb interfaces are getting more and more reliable, but ten years ago firewire was essential for every "small studio", since it guaranteed a reproduction stability, especially for large projects, which Usb interfaces weren't able to give.
If you happen to cross one of these, and it is in good conditions and at a cheap price, I'd recommend you to give it a try! 


Specs taken from the M-Audio Website:

Sample rates: from 32kHz to 96kHz, plus 192kHz playback only to output channels 1/2 and headphones.
Analogue inputs: two, balanced XLR with switchable global +48V phantom power, or unbalanced TS quarter-inch jack instrument, both using mic preamp with up to 66dB gain plus optional 20dB pad, or unbalanced line-level TS jack at fixed -10dBV sensitivity.
Analogue outputs: eight unbalanced TS quarter-inch jacks at -10dBV level (can directly drive up to 7.1 surround), two headphone outputs with individual level controls.
Digital I/O: S/PDIF in and out on phono co-axial and Toslink optical supporting AC3 and DTS formats.
MIDI: In and Out.
Connection to computer: two six-pin Firewire ports.
Frequency response: 20Hz to 40kHz, +0/-1dB.
Signal-to-noise ratio: -104dB
Dynamic range: 108dBA
THD + noise: 0.00281% at 0dBFS.
Dimensions: 9.25 x 7 x 1.9 inches.
Weight: 2.95lbs.


HAPPY THIRD BIRTHDAY GUITAR NERDING BLOG!

Saturday, November 8, 2014

My Favourite 5 Vst Plugins for Mastering (with free and Paid Vst plugins)


Hello and welcome to this week's article!
Today we're completing the overview started with the article "My 10 favourite plugins for Mixing", taking a look to my favourite 5 plugins, free and paid, for mastering.
Why this time 5 instead of 10? Because even though the track can be processed in many ways for mastering, as many as for mixing, I personally prefer to arrive to the mastering phase with an already perfect mix, in order to reduce the processing in this phase to the minimum.

So here's the top 5 Vst plugins that are essential in my opinion in every mastering chain.

1) Compressor: I usually use a broadband compressor instead of a multiband one, because I've noticed that sometimes multiband compressors can ruin the complex castle of cards that is a balanced mix. Among the paid ones, my favourite ones are the Slate FG-X, and the Black 1176 module of T-Racks,  while among the free ones I suggest to try Variety of Sound Density, which is really good, Reacomp from the Reaper plugins suite, and the DiscoDsp Nightshine, which is the reproduction of an Alesis 3630 hardware module.

2) Equalizer: In this section I'm going to repeat what I've always said in the Mixing version of this article: my favourite paid equalizer is FabFilter pro Q 2, which features also a very useful frequency analyzer, and among the free ones, one of the most reliable of all is ReaEq.

3) Harmonic Exciter: Here too, I suggest the same plugins that I use for mixing, confirming once again that often you can mix and master with really few processors, there is no need to load 200 different Vsts in the same project: Harmonic Exciter for its capacity of choosing the frequency area, among the free ones (or you can also try the interesting Antress Audio Modern Exciter), and Izotope Ozone among the paid ones, because it's probably the absolute best for the task.

4) Limiter: On this side I like to keep it simple and traditional: the classic Waves L2 is a standard choice for many professional studios, while among the free ones, there is an insteresting clone of the Waves L1 called Yohng W1, that is definitely worth a try.

5) Metering Tool: I actually use metering tools and frequency analyzers on every step, from mixing to mastering, and even though there is often a frequency analyzer and a metering tool bundled on most of the Daws, I sometimes stick to those 2 freeware ones:
TT Metering tool to keep an eye on the general loudness, and Blue Cat FreqAnalyst to see if there is still some frequency left to tame.

Let me know what do you think about this list and which are your 5 favourite mastering plugins!

Become fan of this blog on Facebook! Share it and contact us to collaborate!!

Saturday, November 1, 2014

Interview: Marco "Cinghio" Mastrobuono (Hour of Penance and Kick Recording Studio)


Marco "Cinghio" Mastrobuono is a lot of things: he's the bass player of one of the most influential death metal bands in Europe, Hour of Penance, he owns a Promotion/Production Agency and a recording studio: the Kick Recording Studio.
Here's his interview:

GuitarNerdingBlog: Hello Cinghio and welcome to Guitar Nerding Blog! Introduce yourself to our readers, tell us your story!

MarcoCinghioMastrobuono: Hi there, and thanks for this interview, really appreciated!
I'm Marco, 28 years old, bass player in Hour of Penance, guitar player in Buffalo Grillz, and dictator at Kick Recording Studio.

GNB: Tell us about your career. We know you worked in many projects during the last few years, and the two most important ones are obviously Hour of Penance and Buffalo Grills.
Which are your career highlights? Which are the artists that influenced you the most? Is it there still some collaboration that you wish you would do?

MCM: Touring with Cannibal Corpse (2 times) was a real dream coming true. I was always musically inspired by them, and Alex is one of the living reason why I play bass.
They are great musicians, and you have no idea how much they are great people, so easy, so funny. 
I still remember one night around Melbourne with George totally wasted after so much drinking. Still one of the funniest night of my life.
It was incredible to play in Indonesia too, the crowd there is crazy and we played in two of the biggest festivals out there, Rock in Solo, and the Hammersonic Metal Fest: thousands people, surely the biggest crowd I've seen in my life.
Another collaboration I wish to do? Slayer. After that I could even quit with music, hahaha.

GNB: What do you think about the actual music business? What are your thoughts about underground and mainstream music scene nowadays?

MCM: Everywhere is great, everywhere sucks. I don't like to talk bad about music scene or business around the world. Hey, music is hard, being a musician is almost impossible, it was hard in the past, it is hard now, and it will be hard forever. You can do all you want in your life, you've just to work fucking hard, sleeping is not contemplated.

GNB: What do you think about the digital music distribution? What about the file sharing? How do you think the music business will evolve in the future?

MCM: File sharing killed the music. In the past if you were courious about some band you had to get your ass out of your home and you go to see them, buy the album, follow them.
Now everything is ready, you listen to the band on Youtube. Youtube is the biggest nightmare ever... All music production is going down, why? Because why should I do an album with a giant and professional production if people will listen to it on Youtube at 144p?

GNB: Tell us some funny story: which one has been your best/funniest experience as a musician? And your worst one?

MCM: The best moment was probably when Nergal from Behemoth tried to read my name on my passport and he said “MARCO MASTURBATIO”. From that moment during all the tour I became MASTURBATIO.
My worst one? Almost 10 years ago, I was touring with my old band and after 2 days of traveling we arrived in a shitty club, we played with 14 years old kids playing Black Sabbath cover in the worst way of the planet, we played in front of nobody, the soundguy left during our show, and when I was putting all the backline in the van under a huge rain, a guy with a beer arriveded and punch me in the face. I litteraly destroyed that guy after that.


GNB: Since many readers of our blog are mainly interested in the technical side of the guitar world, can you tell us something about your studio and live equipment? Can you tell us about the recordings of your latest album?

MCM: I recorded bass on last Hour of Penance album using my Spector EuroLX 5 Alex Webster signature. 
I endorse Spector and there are no better basses out there, every time a band comes into my studio, after making the bass sound I say “Hey, just two second, try this bass, then choose which one you want to use”. Well, the last 10 album in my studio were recorded with a Spector.
In studio, for bass I use Aguilar amps, my favorite one is the DB750, but it's a giant head, and very difficult to bring on tour... So I got a smaller Aguilar Tone Hammer, to bring it on tour with me.

GNB: Tell us something about you recording studio (Kick Recording Studio): which Daw do you use? What are your favourite vst plugins? Do you use hardware outboards or you prefer to mix in the box?

MCM: I'm not a VST fan, and I really love hardware. You know, there are some kind of music you can mix in the box... But if you are in a rock band, and with rock I mean from Led Zeppelin to Behemoth mixing with analog stuff (in my opinion) will give you a different tone.
I could spent hours listening my Urei 1178 working on an acustic guitar, or a bass track going thru my Distressor...And yes there are many VST EQ, all working very good, but, i will always prefer my API, and I'll get a couple of Neve very soon.
Are you using impulses from drums with your favourite samples downloaded from Internet?
No problem, but I still prefer getting a real kick and snare thru my 1073 Neve.

GNB: Let's talk about guitar tone: what is your favourite way to get a good guitar tone? Do you use vst amp simulators or you prefer to mic a cabinet? Have you got any tip to share?

MCM: The ONLY vst amp simulations I like are the Ignite stuff. The Emissary VST is the best amp simulation ever, and the ONLY one that could sounds like a real amp.
Don't tell me “Oh my Fractal sounds like a real amp”, “My Kemper sounds even better!!”, you are a liar, and you know it. I always get problems with digital stuff, especially on the low/mids freq...
Try many mics, don't use more than two if you're trying to get a distorted sound, and start always with an SM57, than add something else.
Get a great cabinet, you can use the best head in the world, if your cabinet sucks you'll never get a good tone.


GNB: Do you have any advice for the guys that wish to open a recording studio on their own, or to become mixing or mastering engineers?

MCM: DON'T DO IT.

GNB: The interview is over! Tell us about your latest works, projects and tours! Thank you very much and we hope to see you soon live!

MCM: Thanks a lot for your time, it was a pleasure. I'm working to some stuff in my studio, and you can check on my soundcloud page all the recent works, please, tell me what you and what you don't like, I always try to improve myself, and your opinion is important.


Become fan of this blog on Facebook! Share it and contact us to collaborate!!

Saturday, October 25, 2014

Review: Beyerdynamic DT-880 Pro


Hello and welcome to this week's article!
This week we're going to review an exceptional headphone set designed for mixing and tracking instruments: Beyerdynamic DT-880.
Beyerdynamic is a German manufacturer specialized in high end microphones and headphones, and in this case we have tried one of the top tier models for tracking, mixing and mastering.

Here are the 3 different models, each one made for a different purpose:

DT 770 PRO – Closed back (studio, stage)
DT 880 PRO – Semi-open back (reference monitoring, mixing, mastering)
DT 990 PRO – Fully open back (critical listening)

I have always said in my articles that a decent pair of monitors is fundamental for mixing and mastering, but since this is a home recording-oriented blog we are fully aware that most of our followers are bedroom producers, that maybe mix by night or with someone else in the room, therefore there are some situations in which using a pair of headphones is unavoidable.
Starting from the point that no headphones will give us an exact representation of the full frequency spectrum (especially the low end is not fully reproduced), there are some manufacturers that are trying to produce specific headphones for mixing and mastering use, and these brands are Beyerdynamic, Akg and Sennheiser, among the others.
Probably Beyerdynamic is one of the highest quality (and most expensive) manufacturers in the market, and actually I have mixed more than one demotape with these headphones; obviously you can't rely only on them, and as always I have, especially in the Mastering phase, made a lot of corrections using other sources, such as the car stereo, the Ipod headphones and the computer speakers, to point-out details that did not emerge using these headphones.

Anyway these are probably the best recording and tracking headphones I've ever tried so far, and I can surely suggest them to any bedroom producer that cannot use a pair of reference monitors.


Specs taken from the Beyerdynamic website:

- Semi-open diffuse-field studio headphone
- 250 ohms
- Analytical Sound
- Comfortable fit due to rugged, adjustable, soft padded headband construction
- Robust, easy serviceable construction as all parts are replaceable
- Velour, circumaural and replaceable ear pads
- 3.0 m (9.8 ft.) coiled cable (single sided)
- Including drawstring bag
- Transmission type:   Wired
- Headphone design (operating principle):   Semi-open
- Headphone impedance:   250 ohms
- Headphone frequency response:   5 - 35.000 Hz
- Nominal sound pressure level:   96 dB


Become fan of this blog on Facebook! Share it and contact us to collaborate!!

Saturday, October 18, 2014

Presets and why you should not use them

Hello and welcome to this week's article!
Today I would like to share my thoughts about presets, since lately I've been asked to share some of my to-go presets for mixing and mastering.
It's not that I don't want to share my presents, it's just that I don't have actually any of them.
First because moving on with the years my plugin chains are getting more and more minimal and my attenction is switching on how to capture a sound that needs less processing to sound good (a good starting sound is really 60% of the total work), second because presets are always "caricatural" and created for a project that is different from ours.

In the mixing phase presets can be useful to understand how a certain plugin works: for example if we load a "lead vocal" preset on the Compressor plugin we can see that the attack usually is pretty fast, that the usual ratio is set on a certain way etc., but then we should reset it and then apply the same principles to OUR specific vocal track, because each project has its own gain staging, and using the preset of a compressor, for example, will mess with our gain staging or not affecting the track enough or affecting it too much, either way ruining it.

Working only with presets will make the song sound unprofessional and bad, then happens that some douchebag asks me "why does my song sounds like a trainwreck? I have applied the signal chain you suggested, loading the presets for the tracks on each plugin!".
The answers are 2
1) I always list ALL the plugins that can be used usually for a single instrument, but then you have to choose only the ones that you really need for your specific track.
2) You don't have to use presets on each track, and if you have no idea on how to use a plugin study it, don't load on the host some piece of software that you have no idea of what it does and wait for some magic, because it will only screw up your project more.

If working without a clue of what we're doing and just relying on presets can screw up our mix, using presets in the Mastering phase can really destroy anything good that's left of our track, since in this case damages are much bigger because they affect all the single tracks together.
Using a mastering suite like Ozone or T-Racks it's not a bad choice, but we should understand exactly what each module does and keep open only the modules that we really need, if we have a processor on and we don't hear any benefit keeping it open or bypassed, we should remove it, and we must also remember that understandind the gain staging and making it work properly is the single most important thing to make a master track sound right.
So turn off all the modules of Ozone, and start turning them on and tweaking one at the time, and see if they are really making our track sound better or not: if they're not essential, we don't need them.

Start trusting your own ears more!


Become fan of this blog on Facebook! Share it and contact us to collaborate!!

Saturday, October 4, 2014

My Favourite 10 Vst Plugins for Mixing (with free and Paid Vst plugins)


Hello and welcome to this week's article!
Today I would like to share with you the list of my favourite plugins for the mixing phase, those are the plugins I use most of the time on the various busses, and so far they've never let me down.
My philosophy is to give continuity to the various sounds of a record, the way the great mix engineers of the past used to do with hardware processors, therefore I like to choose as fewer sound plugins as I can (1 good compressor, 1 equalizer and so on..) and to learn how to use 'em in depth, instead of experimenting 10 different types of equalizers in the same song, for example.
Getting familiar with few processors makes you use them with more awareness (even the ones that comes bundled with the Daw are often more than enough), and using for example the same type of compressor, although tuned differently, for each track of our project will give to the song a sort of "timbric continuity" that eventually will make the record sound more professional.

I have included a list of freeware ones and paid ones, according to your needs, and if you click on the category it will bring you to a dedicated page with even more free plugins to try.


1) Compressor: Antress Seventh Sign for the free ones. T-Racks Black 76 for the paid ones. If i need more controls to make some surgical adjustment, Waves c1 is a great alternative.

2) Equalizer: Equilibre for the free ones, Fabfilter pro Q 2 for the paid: this one features also a very handy built-in frequency analizer.

3) Reverb: I often use the reverb built into the DAW, if it sounds good enough, but when I need to use a third party one, I go for Smartelectronix Ambience (which is donationware).

4) Delay: I like the way the Variety of Sound Nasty Dla colors the sound, plus it's freeware.

5) Autotune: on this ground, Antares Autotune in graphic mode just can't be beaten.

6) Harmonic Exciter: for the free ones I'd suggest Harmonic Enhancer Vst, while among the paid ones, the best is probably the one Built inside the Izotope Ozone suite.

7) Gate: in this field I've noticed that often the bundled plugins are not so good. If you need one, Fabfilter Pro-G is probably the best gate money can buy.

8) Bass preamp: virtual bass preamps are very handy nowadays, and among them I'd suggest Ignite Amps SHB-1 for the free ones, and Overloud Mark Studio for the paid ones.

9) Multiband Compressor: Gmulti, a good freeware multiband comp that I use mainly to tame the lows of electric guitar and bass. For the paid ones the preference probably goes to the Waves C6.

10) Chorus: About chorus I like to keep it very simple: if the one bundled iside the Daw doesn't satisfy me, I usually go for the classic Orange Chorus, which is free.


Let me know what do you think about this list and which are your 10 favourite mixing plugins!


Become fan of this blog on Facebook! Share it and contact us to collaborate!!

Saturday, September 27, 2014

Locking Tuners! A guide for dummies.


Hello and welcome to this week's article!
Today we're talking about a piece of guitar hardware that is often overlooked, but that is a very important aid if our guitar refuses to stay perfectly in tune: the locking tuners.

Those tuners are similar to the regular ones, you still pass the string through the peghead, but before starting winding it around the peg, with locking tuners there is a pin or some other type of retaining machine that "locks" the string in place eliminating the need for wrapping the string around the peghead.

If the string is locked there's no need for it to stabilize around the peg, and this is particularly useful with tremolo / Floyd Rose bridges, which needs the maximum stability to keep in tune.


In order to change the strings with locking tuners first we need to

1) Remove the old strings (that's an easy one)

2) Align the pegheads so that the hole is facing the nut (no pun intended)

3) Insert the string in the peghead (without turning the peg) and fix it into the bridge

4) Lock the locking system below the tuner to keep the string in place

5) Wind up the tuner until the string is in tune (a locking tuner should tune the string with half a turn of the peghead, or less)

6) Remove the part of the string in excess (because we care about the looks too)


Hope this was helpful!

Become fan of this blog on Facebook! Share it and contact us to collaborate!!

Saturday, September 20, 2014

THE BEST FREE VST BASS AMPS (a guide with free Vst plugins inside)


Hello and welcome to this week's article!
A bass can be recorded going straight from a D.I. box to the audio interface, going through a preamp (or an overdrive stompbox like the Sansamp) and then into the interface, microphoning the cab or using a combination of these three methods, but today recording engineers usually tend to avoid miking a cabinet due to the difficulty of getting a really good tone taming the low frequency resonances, and because virtual amplifiers have gotten to a point that they sound realistic enough to take the place of a real bass amp, most of the times.

In the market today there aren't for bass as many virtual amplifiers as for guitar, but still we have managed to try some of them and to decide which one to suggest you.
Let us know what do you think and contact us if you have some other simulator to suggest!


Best Free Vst Virtual Bass Amps:

Ignite Amps - SHB 1 - An excellent Vst that simulates a tube bass amplifier

Fretted Synth 3rd Bass - A bass amp simulator with multi effects

Ronald Passion Bass Preamp - a very good and realistic tube bass amp simulator

Studio Devil Bvc - A Tube amp simulator that can be used for both guitar and bass

Amplitube Free - The free version of Ik Multimedia Amplitube also features a good bass simulator

Tse Bod - it's a simulation of the Sansamp Bass Driver DI, often used instead of an amplifier


Best Free Paid Virtual Bass Amps:

Ik Multimedia Ampeg Svx - A very complete and professional suite for bass amp simulation

Studio Devil Virtual Bass Amp Pro - Another very interesting virtual amplifier with a rich interface

Overloud Mark Studio II - A beautiful and complete bass suite, the bass version of Overloud Th2.


Once we have found a tone that suits to our needs, we can mix it using our Bass Mixing Tutorial!


Become fan of this blog on Facebook! Share it and contact us to collaborate!!

Saturday, September 13, 2014

How choose the right pick for your guitar or bass (a guide for dummies)


Hello and welcome to this week's article! Today we're talking about guitar and bass Picks!
Also known as Plectrum, the pick is a small piece of plastic or nylon (or other material) that helps us picking the strings instead of using our fingertips or our nails, and it also gives the tone a hard, clean attack, letting us go much faster on the alternate picking technique and palm muting; for some genres, such as folk, country rock or some type of classic rock (for example Eric Clapton and Mark Knopfler often don't use one) the pick can be considered just an option, while for others (heavy metal, blues etc...), the pick it's completely impossible to avoid.
Speaking of bass, instead, picks are used by much fewer musicians, usually only when they require a strongly percussive sound, and it can be found usually in hard rock, punk or metal bands.
The pick's characteristics and the way we strum will mix with all the other rings of our signal chain and it will change dramatically the final result; let's take a look to how the various pick types affect the tone.

Size and shape: Pick size can vary from being quite large to very small, leaving just a tiny part of it outside the grip of our fingers.
The rule of thumb is that wider picks are suggested for playing open chords, while the smaller ones, that gives us more control and speed, are more suited for faster music and solos.
The shape can be equilateral (used especially from beginner players since they can use the pick on any angle), to the classic "drop shape", up to some more uncommon designs such as the "sharkfin shape", for example.
Each design offers a different playing experience, and only by trying them out we can find the right one for us.

Material: In the beginning of string instruments people used to strum with bird feathers, wooden shards or animal bone pieces (ivory, parts of tortoise shell...), then in the 20th century there has been a large production of plastic and nylon picks, and today (in addiction to all the previous types) manufacturers are experimenting also with metal, carbon fiber and stone.
The idea is that the harder the material is, the harder will be the attack on the strings, therefore the sound will become more loud and bright, while using softer materials the sound will be more sweet and mellow.

Thin or Thick: The thinner a pick is, the more is flexible and it will bend while strumming, the thicker it is and the more it will mantain its shape, making more resistance on the strings and therefore making them sound louder.

Now that we've seen how the different specs of a pick will affect the final sound we can choose the combination of features that suits to our playing style, but the only way to really find the right pick is to go to a shop and try some of them on our guitar or bass.
For bass obviously there will be less choice: the strings are so thick that we're going to need thick, wide picks made of a very resistent material.


Become fan of this blog on Facebook! Share it and contact us to collaborate!!

Saturday, September 6, 2014

4 THINGS TO DO TO GET YOUR BAND READY TO RECORD


Hello and welcome to this week's article!
Today we're going to talk about the 4 most important things to do BEFORE going into the studio, to make a good record!


1) Have the musicians learn the songs BEFORE starting recording!!

This is intuitive, yet some band still walks into a studio with just one member or two that has a clear idea of the song structures. The others sometimes just barely knows their own parts, and sometimes they also need, when tracking, some other band member that tells them the parts of the song or the chord changes IN REAL TIME. This is just a waste of time, money, and it's almost impossible, even for the most skilled engineers, to fix in the mix.


2) Prepare the instruments for the studio:

Another widely overlooked topic. When I have to record a band, the first thing that I ask them, before starting, is to go to a luthier (or to do it themeselves if they are good) and to change the strings and set the octaves on their string instrument.
Basically, before recording, an instrument requires a full setup.
When I hear "well, I don't have the money, I don't need it, the bass just sounds good this way", and other excuses... I already know that the tracking session will be a struggle, the string instruments will sound out of tune among them, and the album will sound DULL (and the dumbasses will blame me).
By the way, the drums should be tuned if possible by the drummer (there are a lot of good tutorials surfing the web), with a set of new skins, if the ones mounted are worn out.
The live sound of the drum should be as close as possible to the final result the drummer wants to achieve, it will MUCH easier to make it sound great!


3) The guys must know how to record with a click from WAY before getting into the studio:

The band that wants to record an album with today's standards, MUST record with a metronome, and the only way to record decently with a metronome is to exercise with it at home, and to have the metronome in the drummer's ear when rehearsing.
If the band starts tracking and nobody, or just the drummer, has any idea of what a metronome sounds like, there is 99% of the possibilities that the record will sound like crap, even with an inhuman editing work.


4) Have everything written down, even the details, to not improvise:

One of the worst mistakes that can be done when recording it's to think "it doesn't matter, I will improvise the solo when tracking", or "I don't know the vocal harmonies intervals, I'll sing what I will feel at the moment", or even "I sometimes insert variation when I play to give the record that LIVE feel".
If you find yourself saying one of those three things and you're not Dave Murray or Miles Davis, you should not enter the studio. You should go home and write down even when you should draw breath, then you can come back and record.


Become fan of this blog on Facebook! Share it and contact us to collaborate!!

Saturday, August 30, 2014

REVIEW: BOSS NS-2 NOISE SUPPRESSOR


Hello and welcome to this week's article!
Today we're going to review a classic stompbox, present in the live and studio rig (mostly live, though) of many famous artists, such as Slipknot, Machine Head, Mastodon, Killswitch Engage and Linkin Park, basically the major league of modern heavy metal: the Boss NS-2 Noise Suppressor.

Compared to other modern noise suppression stompboxes the Boss NS-2 today may not result the first of the class in terms of transparency, especially on a head to head comparison with an Isp Decimator; the pedal nonetheless has been the first choice by many professional musicians due to its reliability, and due to the fact that Boss stompboxes are really built like a tank, made for the tour life with the highest level of reliability.
Plus it's cheap and gets the job done fairly well. 
The unit features a dual input and dual output: the first input and the first output are made to stay at the top of the guitar effect chain, while the second input and output are made to go in the send and return of the amplifier (the effect loop), or if there are other effects, from the return of the amplifier to the input of the first effect: this way with the first input and output we clean the sound of our guitar from the pickup hum and unwanted feedbacks, and with the second one we polish the sound even more before going through any modulation effect (e.g. a Delay), to make sure that no noise gets effected. 
Just make sure that the NS-2 it's always on the top of the chain, because for example if we'd set it after a Delay, the noise gate would cut the repetitions. 

My overall judgement on this unit it's very positive, and it's a great bang for the buck, but at the same time I think that a Noise Suppressor should be used only when really necessary, for example playing heavy metal or other hi-gain genres, otherwise, if the signal-to-noise ratio it's bearable, I wouldn't suggest to use it, it would only reduce the sustain of our guitar without a real upside.

Specs taken from the Boss Website:


Input Impedance 1 M ohms

Output Impedance 10 k ohms or greater

Equivalent Input Noise Level -110 dBu or less (IHF-A, Typ.)

Connectors INPUT Jack, OUTPUT Jack, RETURN Jack, SEND Jack, DC In, Out

Power Supply DC 9 V: Dry Battery 9 V type (6F22/9 V), AC Adaptor

Current Draw 20 mA (DC 9 V)

Accessories Dry Battery 9 V type (6F22/9 V)

Option AC Adaptor (PSA-Series)