Labels

BASS (50) COMPRESSION (32) DRUMS (45) EFFECTS (49) EQUALIZATION (30) GUITAR (112) HOME RECORDING (95) IMPULSES (21) INTERVIEWS (19) KARAOKE (1) LIVE (10) MASTERING (61) MIDI (21) MIXING (179) REVIEWS (156) SAMPLES (69) SONGWRITING (19) SYNTH (3) VOCALS (31)

Sunday, December 30, 2012

MODULATIONS PART 3: DELAY AND ECHO! (with Free Vst Plugins Inside)


Hello and welcome to This week's article!
Today we're going to talk about Delays and Echos! These effects are also called Time Based Effects, because they take the first sound and repeat it continuously at a certain rate, as if you were talking inside of a cave, with the reflections of your voice coming back to you on a delayed time, summing up one another.
Although the two terms are today exchangeable since they refer to the same thing, usually with "echo" we refer to the natural phenomenon, while the delay is the implementation of that in the audio effect; 
in common language many manufacturers calls "echo" a warmer, more vintage sound,  and "delay" a crispier, more digital sounding effect. 
Delay is an effect born in the '50s by recording a sound on a tape and playing it continuously to simulate an echo (the famous "Tape Echo"), but today it is a very common tool featured on pedalboards and racks of virtually any guitar player in the world; the two guitarists that probably own more of their trademark sound to this effect are Robert Fripp of King Crimson and The Edge, from U2 (which is famous for his riffs that are often exclusively based of the layers of delay).
Delay is the basic modulation effect, from which descends almost all of the other modulations: Chorus, Flanger and Reverb are consequences of applying particular settings to a delay, but there is also another use of a extreme settings applied to this effect: the looper.
A looper is a delay which records long phrases of an instrument, up to several seconds (e.g. a guitar riff) and set them in loop, so that for example a guitar player can play a solo above that base.

The most common and specific uses for a delay are the Doubling Echo, the Ping-Pong delay and the Slapback Echo.

Doubling Echo: Is used to create a sound that feels like the original instrument has been doubled by a second one, and to do this the delay time must be very short: 10 to 50 milliseconds. 

Slapback Echo: instead is a longer delay effect (75 to 250 milliseconds), and was often used in the '50s records to underline the main vocals, and later in the '80s it's been used on synths and percussions too, to produce creative rhythmic textures.   
Today Delay is often syncronized to the metronome of our Daw, to ensure that its repetitions are perfectly in sync with the song, but if we want to make the repetitions to cut through without being overshadowed by the other rhythmic elements of the mix it's suggestable to use the same metronome but with different beats, for example triplets, or a 5/4 rhythm; the delay will still be "on the click", but the repetitions will be noticed more.

Ping-Pong Delay: a particular type of stereo delay that "bounces" the repetitions (sometimes called "Taps") from left to right, sometimes it has been used by Jimi Hendrix and Brian May from Queen, among the others. 

Here are the most common controls found on Delays and Echos:

Length (time) - The delay of the repetition in ms (thousandths of a second)

Length (musical) - The length of the repetition in beats (e.g. 1/8 note)

Feedback - How much of the delay output is fed back into the input of the effect.

Wet/Dry (sometimes these two controls are fused on a single control called "Mix")
Wet - The amount of processed signal in the output.
Dry - The amount of unprocessed signal in the output.

Lowpass filter - A filter, which filters out from the repetitions the frequencies ABOVE this value.

Hipass filter - A filter, which filters out the frequencies BELOW this value.


Today most DAWs already feature some basic Delay and Echo Effect, but if you want to try something new and different here's a selection of the best freeware Delay and Echo Vst:

Readelay, a one of the most used free delays around, very versatile and professional

Variety of Sound Nasty Dla II, an excellent Chorus and Tape Echo device

Valhalla Freq Echo a creative and easy to use delay

WatCat a very interesting replica of the vintage hardware "Custom Copicat" device

Tal Dub a vintage style delay effect

TapeDelay a very simple tape delay effect

Saturday, December 22, 2012

WHAT IS A SCALLOPED NECK (a guide for dummies)


Hello and welcome to this week's article! Today we're going to talk about scalloped fretboard!
What is a scalloped fretboard? It's a guitar fretboard where the wood is filed down between the frets, making it look like the shell of a scallop:


Why would someone do this to his guitar?
To "increase the height" of the frets, thus avoiding the player to reach for the fretboard while playing, basically making the player just to push his fingers on the string without touching the wood: if the guitarist would try to touch the scooped out fretboard, he would obtain a bent note, due to the increased distance.
This technique was featured sometimes on a medieval instrument, the lute, and it was introduced on the electric guitar by Deep Purple's guitartist Ritchie Blackmore, being a medieval music lover himself.

Playing a scalloped neck can be hard at first, especially for those players who likes pushing with their fingers until they are firmly planted on the fingerboard, but on the other hand it will enhance the clarity and articulation of each note, and that is the reason why many shredders prefer to use it: because it shows even more the effort they put into creating and perfecting their technique. 
A scalloped fingerboard also helps the player to learn how to play better by forcing him to push more lightly on the strings (to avoid unwanted bendings), and makes some technique as tapping, pull off and bending a little easier.

There are different types of scalloped fretboard: the Yngwie Malmsteen signature Stratocaster has the whole fingerboard scalloped, while the Ritchie Blackmore model starts flat and becomes increasingly scooped towards the higher frets.
There are also many guitars (manufactured by Esp, Ibanez and many more) that features a flat fingerboard that becomes scalloped only in the last highest frets.
If you don't want to dig the fingerboard of your guitar but want to try the "scalloped feeling", you can also just mount higher frets, such as the Dunlop 6000, which can get you very close to the same result.  

To choose wheter this kind of guitar neck suits your playing or not it's up to you, in the meanwhile never stop experimenting!

The staff of Guitar Nerding Blog wish all of you a Merry Christmas!


Become fan of this blog on Facebook! Share it and contact us to collaborate!!

Saturday, December 15, 2012

MODULATIONS PART 2: PHASER AND FLANGER! (with Free Vst Plugins Inside)


Hello and welcome to This week's article!
This time we continue our research for modulation effects focusing on Phaser and Flangers.
The sonic result of these two effects is pretty much similiar, but the phaser is softer, smoother and less extreme, while the flanger is more "Jet-Like".

The Phaser is the first of the two effects to be invented (around the '60), and consists into splitting the signal in 2 identical ones, and into applying to one of them a filter that alters its phase. By summing the two signals; the obtained effect it's a rhythmic phase cancellation that variates according to the settings, thus creating the "oscillating" sound typical of phaser.
The Phaser, unlike the flanger, doesn't work by delaying the second signal and summing it to the first one, therefore the sound is less aggressive.
Additionally, the output can be fed back to the input for a more intense phase shifting, creating a resonant effect by emphasizing frequencies between the wave notches. 
This effect has been use extensively by many bands, especially the psychedelic rock bands of any time, but the most famous guitar player that has used it on its records is probably Jimi Hendrix.

The Flanger effect is produced by summing two identical signals together, with one signal delayed of a small and gradually changing period, up to some centisecond. This produces a phase cancelling effect that variates according to the variating lenght of the delayed signal, producing an effect called "Comb Filtering", named after the visual effect this process does to the waveform.
Variating the time causes the two tracks to sweep up and down the frequency spectrum, and the flanger is the effect dedicated to produce this result.
Part of the output signal is sometimes fed back to the input, producing a resonance (sometimes even inverting the phase of the fed back signal) which further enhances the intensity of the effect.
One of the most famous guitar players that has used this effect on many songs is Edward Van Halen.

Here are the most common controls found on Flangers and Phasers:

Depth: Sets the depth of the flanger and phaser effect, the width of the oscillation. Higher values equals to deeper oscillations.

Resonance: Sets the amount of resonance. Higher values equals to more effect. 

Rate: Sets the cycle speed of the effect: higher values means a faster effect cycle. 

Modulation Phase: With this control the effect can be oriented on the stereo field in different time rates between left and right, in order to give it more ambient. To use this effect live we need a stereophonic amplification.

Today most DAWs already feature some basic Flanger and Phaser Effect, but if you want to try something new and different here's a selection of the best freeware Phaser and Flanger Vst:

Wok Flanger - a stompbox style flanger

Kjaerhus Audio Classic Flanger - simple to use 

Kjaerhus Audio Classic Phaser - simple and essential. 

Smart Electronix SupaPhaser - less simple, but with more presets. 

Blue Cat Audio Blue Cat's Flanger - simple yet effective. 

Smart Electronix MdspFlanger a flanger synchronizable to the tempo with different waveforms

Smart Electronix Phase90, a clone of the Mxr Phase 80 guitar stompbox

EmptySquare NXTPhase, described as "a phaser with an attitude". 

Tal Phaser, a stereo Phaser Effect

Saturday, December 8, 2012

THE ELECTRIC GUITAR BRIDGES: TREMOLO (PART 2/2)


CLICK HERE TO READ PART 1/2

On the first part of our article we focused our attention especially on Fender Tremolo Bridges, but also Gibson guitars featured a noticeable amount of technology through the years, starting from the Bigsby bridge, that we have already seen.

The first attempt of Gibson at producing a proprietary bridge resulted in the Gibson Vibrola, which basically was a Bigsby Clone, with all the mechanism set outside the guitar body, but through the first years of the '60s the company kept on developing the project, giving birth to the Gibson Vibrato
The Gibson Vibrato was mounted on some SG model (which at the time were still called Les Paul),   and consisted on a long tailpiece that ended at the bottom of the guitar, with a whammy bar mounted on its side; the excursion of the bar was very low and the unit didn't have much success, but it'considered a passage to the more famous Gibson Deluxe Vibrato, produced from 1963, which had more fortune.

The Gibson Deluxe Vibrato finished what the first Gibson Vibrato started: to create an efficient Tremolo Bridge alternative to the Fender standard. The Deluxe version was a shorter and more effective version of the first Gibson Vibrato, and was featured mainly on the semi-hollow models of the brand, while the Short Version (called Short Vibrola) was mainly featured on the solid body models. These bridges have been offered always as an optional on Gibson guitars, while on the Fender models, the two point Synchronized Tremolo became a standard, so now the classic Gibson guitars that features a non-fixed bridge are considered a valuable collector item.

While other brands tried to develop their own tremolo standard almost all of them failed to gain success, but between the end of the '70s and the beginning of the '80s a new kind of Tremolo Bridge gained worldwide exposition, becoming a new standard on most of the guitars played by the raising heavy metal bands of the time: the Floyd Rose.

The Floyd Rose tremolo system is an "extreme" version of the Fender Synchronized Tremolo, featuring an extended excursion that allows the player to perform dramatic pitch drops, generating effects such as the "dive bomb", while retaining the original tuning.
The "secret" lays on a locking plate on the head nut, tightened with a hex key to fix the strings at this point after tuning. This provides extra tuning stability, but as an unwanted side effect it also prevents further adjustment of the pitch using the machine heads.
To refine the tuning without unlocking the nut, the player can use the fine tuners provided as part of the bridge mechanism on all but the earliest units.
This unit has been brought to world success by bands as Iron Maiden and Van Halen, plus it's a standard used by numerous guitar heroes such as Steve Vai, and as today it's still featured on high end guitars of almost every manufacturer, with no modification from the original project.
Licensed Floyd Rose versions are available for lower price guitars, or some guitar manufacturer produced its own Floyd Rose "proprietary clone", such as the Ibanez Edge or the Steinberger TransTrem

CLICK HERE TO READ PART 1/2

Become fan of this blog on Facebook! Share it and contact us to collaborate!!

Sunday, December 2, 2012

THE ELECTRIC GUITAR BRIDGES: TREMOLO (PART 1/2)


Hello and welcome to this week's Article!
Today we're going to talk about Tremolo, a classic guitar bridge often seen on Fender Stratocasters, but also featured on a wide variety of other guitars.
Let's start off by clearing what it is: the tremolo bridge is a particular guitar bridge that allows the player to use a lever (called Whammy Bar) to alter the string tension, thus altering temporarily the pitch and producing an effect called "Vibrato", which, according to the particular type of bridge, may be softer or stronger.

The first attempt of building a Tremolo bridge was the Kaufmann Vibrola, built around the '30s and mounted on some Epiphone and Rickenbacker guitar, and thoughout its evolutions the bridge managed to survive until the late '50s, also thanks to an unique invention: an automatic vibrato effect generated by the bridge itself, rhythmically moved by an electric powered circuit.

The Tremolo bridge that became the first to be mainstream though was the Bigsby, created at the beginning of the '50s by Paul Bigsby. This type of bridge was completely outside the body of the guitar and solved the notorious problem of the Kaufmann bridges: it didn't throw the guitar out of tune so easily.
This bridge was featured on many Gibson guitars, and still today it can be found on the most high end hollow body and semi-hollow body guitars on the market, due to its vintage look and classic sound.

To this day, the most famous Tremolo bridge on the market is the Fender Synchronized Tremolo, created by Fender towards the half of the '50s (Click here to see an original picture of the 1954 patent application).
This bridge was revolutionary and it required holes on the guitar body, in order to mount on the back of the guitar three-to-five coil springs, to bring the string tension back to normality once the whammy bar is released.
The bridge is formed by six bridge saddles held against a plate by string tension, and individually adjustable both for height and intonation, and it is anchored to the guitar by six screws, although the most famous bridge version is the "Fender two-point synchronized tremolo", which featured only the two most external ones.
The "Fender two-point synchronized tremolo" is still today the most used (and copied) tremolo bridge on the market, and it has been used by Jimi Hendrix and Pete Townshend, among the others.

The Floating Tremolo was an evolution of the Sinchronized tremolo featured on the Fender Jazzmaster model, it was presented in 1958 and it was much more complex.
The particularity of this kind of Tremolo system is that its mechanics allows the player to retain the strings tuning even better than the other types of bridge, and that it's blockable, so if a string is broken, the player can still keep the other ones in tune.
Unfortunately this bridge didn't have too much success due to some string resonance on some frets, that at higher volumes can cause some problem, and due to its complexity today is featured only on some custom shop model.

Around the half of the '60s Fender presented also another Tremolo bridge: the Dynamic Vibrato, featured on the Mustang model. This kind of bridge combined elements from the previous ones, and it's still today mounted on the Fender Mustang, for its look and because some player still consider it the best Tremolo bridge ever created.
The tremolo system is integrated with the bridge, unlike the Floating Tremolo which is composed by two separated parts, and became popular worldwide because it was mounted on the Jag-Stang (a custom hybrid between a Fender Jaguar and a Mustang) used by Nirvana's Kurt Cobain.

CLICK HERE TO READ PART 2/2

Become fan of this blog on Facebook! Share it and contact us to collaborate!!

Monday, November 26, 2012

MODULATIONS PART 1: CHORUS! (with Free Vst Plugins Inside)


Hello and welcome to This week's article!
Today we're going to talk about Modulation Effects, focusing on the Chorus Effect.
Modulation effects are filters that takes a given signal and creates a copy, with a given delay and pitch modification, to be summed with the original one, creating a wide range of different results.
The Chorus effect is an effect that can enrich remarkably a sound: it doubles the sound creating a slighly delayed (usually around 20ms) copy whose delay will not be stable but will keep on variating, oscillating 5ms more and less, plus the copy's pitch is slighly detuned, giving the impression that the copy is (in case of a Vocal track) another person singing along with the first one: not identical, but very similiar, and this effect is used to make the original sound wider and fatter.
This effect was particularly used in the mid '80s, for Vocals and guitar solos, in order to add more character and make them sound more metallic.

The Chorus' most common controls are:

Depth: This control sets the depth of the effect: the higher the value is, the deeper will be the oscillations. Basically it's the Chorus' intensity. 

Rate: This one sets the effect cycle, which is the speed of the Rhythmic detunings, from very slow (less than a cycle per second), if we set it to 0, to very fast (rarely used), if we crack up the control.

Feedback: This control refers to the process of feeding back a part of the effected sound on the input of the effect itself, therefore we decide how much chorus will be sent a second time through the effecting process: this will lead to a much more effected result, good for creative uses.

Pre-delay: This control lets us choose after how many milliseconds from the original sound the effect will activate. A higher value will make the chorus to intervene after a longer time, allowing the original sound to be heard uneffected before it starts affecting it, while if we set it to 0, the effect will engage immediately.

Level: This one sets the mixing level of the Chorus with the original sound: a higher value will lead to a higher wet-to-dry ratio. 


Most of DAWs already features a Chorus effect, but if you want to try some cool vst downloadable for free here's our suggestions:

OrangeChorus: one of the best free Chorus Vst Around, very simple.

Blue Cat Chorus: versatile Chorus with Spread control

Kjaerhus Classic Chorus: a simple but effective chorus

Gvst Chorus: simple and effective chorus Vst

Tal-Chorus-Lx: an interesting vintage chorus modeled after the Roland Juno 60

Betabugs Monsta Chorus: an interesting vintage chorus effect

Chorus Ch-2: a versatile Hi Quality modulation engine

SimpliChorus: an interesting Stereo Chorus effect

Sunday, November 18, 2012

HOW TO MIX A GUITAR SOLO (a guide for dummies)


Hello and welcome to this week's article! Today we're goint to talk abot How to Mix a Guitar solo!
Let's start off assuming that we have already recorded our solo, by Microphoning our amplifier, or using a Guitar Amp Simulator plugins, or even a Hardware Processor.
Once that our track is ready for mixing, we must keep in mind that our Lead Guitar track will share the same mid-range frequencies used by our rhythm guitars, so we must find a way to make the solo cut through while remaining "in the mix" at a volume comparable to the other intruments.
Usually the idea is to push the lead guitar part a little bit more on the mid-range than its rhythmic counterpart, just enough to make it cut through: we can treat it on a way similiar to how we mix Vocals, since usually a Solo takes the place of the voice in a song, therefore we can usually Pan it to the centre of the soundstage, unless we're after some particulare effect.

On the Equalization side we can usually use a wide Hi Pass filter, taking out everything from 160hz down, then (after the Compression) we can do a gentle boost on the "vocal area", somewhere between 3khz and 5khz.
It's a good idea also to cut some db on the rhythm guitars, in the same area we're boosting our solo: this will help us to cut through the mix even better (another Interesting way to cut through it's also to use a different guitar or amplifier than the one we have used for the Rhythm guitar Tracks).

On the Compression side we can use very fast attack and release times (even 10ms or less) and a low ratio, from 2:1 to 10:1 according to the amount of dynamic we want to keep, bearing in mind that the dynamic response it's a very important part of a good guitar solo, so we must not over-squash it: let's use less Compression than the amount we have used on the rhythmic side!

On the Effects chapter, it's important to say that a guitar sound is probably the one that accepts effect processing better, so we can use if we want some very subtle Reverb or some Chorus/doubler to give some thickness, but the most commonly used effect on guitar solos nowadays it's the Delay, which helps the sustain and gives to the sound a pleasant "bounce-back" feel. Some Tube Saturation or Harmonic Excitement can help the sound to cut through the mix even more.

Click here for a dedicated article about how to use an fx track for our solos.

Finally, if after all this processing we feel that our solo isn't emerging from the mix yet, our last resort is to Automate the rhythm guitar tracks to lower their volume a bit (half db or a db will usually be more than enough) in order to clear some headroom, to make our solo soar over them.

So Here's our Chain: Signal -> Subtractive Eq -> Compression -> Boosting Eq -> (Tube Saturation / Harmonic Exciter) -> Delay -> (Reverb)

Click Here if you want to learn how to Mix a Hi Gain Guitar!!


Become fan of this blog on Facebook! Share it and contact us to collaborate!!

Saturday, November 10, 2012

GUITAR AND BASS: WHAT IS RADIUS?


Hello and welcome to this week's article! This time we're goint to talk about Radius!
When we use the radius term, talking about guitar or bass, we're not referring to the radioactive chemical, but to how curve or flat the fretboard and the frets are.
Different roundnesses provide different playing feels, and some are better suited to particular styles than others are, but as a general rule, the flatter the radius is, the easier will be to go fast, and shred.

When we see the radius mentioned on a guitar or bass spec sheet, it is usually expressed in inches (ranging from 7.25" to 18", but there are even more extreme versions) and the higher this value gets, the flatter the fretboard will be.
The idea behind a more curvy or flat neck is based on the type of music we need to play: a curved radius (e.g. 7,25" or 9,5") will be more suited for playing chords, since the fretboard will "accept" more easily the shape of our hand, especially when doing Barre Chords, while flatter radiuses (e.g. 15,75" or 18") will let us do easier bendings, and advanced techniques as string skipping or sweep picking.

The ideal middle ground has been introduced by Gibson and is the radius of 12", which is still the most common today (on Bass instead is often used a radius of 10"), but throught the years some manufacturer (such as the same Gibson, or Charvel and Jackson) has introduced also a compound radius that starts from 10" on the nut area (to be more "chord friendly") and progressively becomes flatter, to 16" on the other end of the neck, to let solos to have more sustain (in facts the rounder the neck, the farther the "external" strings will be from the fretboard). 

Hope this was helpful!

Become fan of this blog on Facebook! Share it and contact us to collaborate!!

Saturday, November 3, 2012

HOW TO RECORD AND MIX DRUM CYMBALS (PART 2/2)


CLICK HERE FOR THE PART 1/2 OF THIS TUTORIAL!

Once we have seen how to acquire our cymbals sound, we sould now find ourselves with Four mono tracks: two for the Over Heads (Left and Right), one for the Hi Hat and one for the Ride, therefore now it's time to start mixing.

- Overheads: the idea is to Pan those two tracks very wide, often 100% left and 100% right, to give to our Crash Cymbals as much space as possible, then we need to Hi Pass and Low pass them, in order to give to the tracks a proper frequency range that will not make them fight with the others.
First off we should create a Group Channel track where to route the two single tracks, and then we can start off by loading on the Group Channel a Hi-Pass Filter, taking away everything below 100hz to 500hz, until we find the spot where the bulk of the drums disappears (unless we don't want purposely to retain some spill on those tracks too, to beef up the global drum sound), then we can Low-Pass around 10/12khz, to avoid the sound to become too harsh.
Now the only thing left to do is to start manually to pin down the Resonant Frequencies (which are, if we look at the Spectrum of our sound, the frequencies that produces the highest and most annoying peaks), and see if our cymbals are Eq Masking the frequencies of other important tracks (Vocals, for example).
If this happens, it's a good idea to scoop a bit around the 3/4khz area to clear some room for Vocals, and if needed we can also take away something around the 500hz area too, to eliminate a bit of "Room Mud".
The last thing to do, if needed, is to Compress the sound just a little, in order to soften a bit the hardest hits.

- Hi Hat: This cymbal is seen more as a part of the snare sound than an ambient cymbal, and therefore shouldn't be Panned too far from the snare: someone sets it straghit to the centre of the soundstage, someone else pans it slightly to the left (about 12.5 left), as if it's heard from the drummer's perspective.
We can Hi-Pass the sound, as for the others cymbals, until most of the snare goes away (300 to 500hz, usually) and then Low-Pass it at about 10khz, eventually taking out some other frequency if the general sound feels a bit "gongy". To add some brilliance we can boost a little around 6khz.

- Ride Cymbal: this cymbal should be Panned usually somewhere on the right area (like 12,5 right), and its particularity, compared with the Hi Hat, is a usually stronger low end. In order to make the ride sound brighter we can Hi Pass the sound to about 3/500hz, then we can boost a couple of dbs at about 10/12khz to add some air and sparkle. Watch out for resonances on this track too!
Similarly to the Hi Hat, if we feel that there are some frequencies that are fighting with the Vocals ones, we can scoop around 3khz.

We can also route the Hi Hat and the Ride Cymbal on another Group Channel Track to add a little bit of Compression, just to peel off some of the peaks.

Very important: If we're using Compression (and usually it is suggested for hard rock songs, up to the most extreme metal, not for softer genres), we must keep in mind that the settings should be very very low, since it's really easy to create an unnatural effect with cymbals! Same is for Reverb: usually it's not suggested, but in some cases, when the overall drum sound is very dull and lifeless, if we use a Plate Reverb on "homeopathic doses", it can add some body and room to the general sound.


Become fan of this blog on Facebook! Share it and contact us to collaborate!!

Sunday, October 28, 2012

HOW TO RECORD AND MIX DRUM CYMBALS (PART 1/2)

Pic. 1

Hello and welcome to this week's article! Today we will talk about How to Record Cymbals!
There are many ways to record Cymbals, and the technique has evolved greatly throughout the time: from the early recordings, at the beginning of the 20th century, with nothing but a condenser microphone in the middle of the room to catch the sound produced by the whole band, to the most complex combinations of close miking of any single drum piece with other microphones to take care of the global room sound. 
The technique we're going to show you today it's a compromise between the need to capture the life of the recording room and the flexibility of having two single tracks for Hi Hat and Ride.
This technique can be successfully used with a natural drumset as well as with a triggered one (or a drum with its signal Replaced), although with a triggered drumset, if properly muted, is even better: we will have "clean" cymbal tracks, reducing to the minimum any unwanted mic bleed from other drum parts, and this will help us greatly during the Editing Phase.
Some musician even prefer to record cymbals without using the drumset at all, using just the cymbals and their stands, microphoned: the drummer plays the cymbals as he would do using a drumset, following the song on his headphones. This method may feel a bit unnatural, but it's the "cleanest" way to record the cymbals signal with zero bleed from the drumset :)

Let's start talking about Overhead Cymbals (Crash, China, Splash...): these are the cymbals that are positioned above the drumset, and their sound can be captured with a couple of overhead microphones (Pic. 1), which can be dynamic, but it's very suggested to use Condenser Microphones (e.g. for our recording we have used a pair of Akg C1000), since they can capture many more details. They can be positioned with the X/Y method, as shown in Pic. 1, creating a 90° angle to one another, at around 3 or 4 feet of height (1-1.20 meter) from the drumset. This setup is good to record the whole drumset / cymbals area providing phase coherence (therefore less frequency cancellation). 
There are other methods too, for example the A/B positioning: the two microphones must be at the same height, on the left and right side of the drumset, set horizontally (large diaphragm mics) or pointing towards the center of the cymbal group of their side (small diaphragm mics). 
The A/B positioning is more suggested with large diaphragm condenser microphones, while the X/Y positioning is for the small diaphragm ones, like depicted on Pic. 1.


Pic. 2

Now let's talk about the Hi-Hat (also known as "Charleston"): this drum part actually consists of two cymbals that are mounted on a stand, one on top of the other, and a pedal which can be used to clash and hold the cymbals together. 
This cymbal can be close-microphoned, since it's a very important part of a drum sound, complementary to the snare. We need to process it alone, if possible, so the Hi-Hat can be microphoned with a small diaphragm conderser or with a dynamic microphone, such a Shure Sm57 as shown on Pic 2, on the upper side of the Cymbal, at a distance of a couple of inches, at the opposite side of the Snare, in order to catch as less snare sound as possible. 


Pic. 3

The Ride cymbal is another important drum part, with a function similiar and alternative to the Hi-Hat, so it's suggested to record it with another dedicated microphone, which can be a dynamic one as well (another Shure Sm57 on this will be perfect), but this time the right positioning is Below it, at about 2 inches of distance (Pic. 3), in order to catch as less bleed from the other drum parts as possible.

These four microphones must be connected to four Microphone Preamplifiers, therefore we will need an Audio Interface with at least four Mic Preamps, or an external Mic Preamp / Mixer to be connected to our Audio Interface on a way that lets us stream the sound of each single microphone on a different track.

Ps. Thanks to Francesco Paoli and Cristiano Trionfera from Fleshgod Apocalypse for their help on recording the drums of my band! ;)

CLICK HERE FOR THE PART 2/2 OF THIS TUTORIAL!

Become fan of this blog on Facebook! Share it and contact us to collaborate!!

Saturday, October 20, 2012

HOW TO CHOOSE THE RIGHT AUDIO INTERFACE (a guide for dummies) PART 3/3


CLICK HERE FOR THE PART 1/3 OF THIS TUTORIAL!!

CLICK HERE FOR THE PART 2/3 OF THIS TUTORIAL!!


- Something about Microphone Preamplifiers: As we have already seen, the quality of the microphone preamp components and the quality of the ADC - DAC converters is where most of the price of an audio interface lies. The more an interface is expensive, the better probably those crucial sections are, in terms of construction and electrical components quality.
Which are the characteristics of a Mic Preamp, beside its intrinsic quality? The presence of a 48V Phantom Power switch, that is used to transmit electricity through the cable to a Condenser Microphone, a kind of microphone that features an active electronic circuitry and cannot work without this function; beware not to turn the Phantom Power on when plugging a dynamic microphone, otherwise you may damage it!
Another interesting feature often found on Mic Preamplifiers is the 20db Pad, a function that drops the input signal 20db lower, and this function is useful when plugging to the interface some instrument that has a signal too high, so high that it cannot be compensated just by turning down the input knob.
Beware when recording of avoid clipping at any cost! If the "clip" led (or meter, according to the type of interface) turns red, the input level is too high, this means that some part of the signal gets lost and it's interpreted by the DAW as plain noise. In this case, is very suggested to record again the part at lower settings, because it's practically impossible to restore.

- Something about the Dsp Processors: The most high end interfaces on the market sometimes features an additional processor, created to provide effects (such as Compression and Reverb, for example) without consuming the computer's CPU.
This is particularly useful when recording Vocals, since singers often need some real time processing on their headphones, at the lowest latency rate possible, in order to hear themselves "in the mix" while performing.
We can find a Dsp on the top-range Interfaces of many manufacturers: Motu, M-Audio, Focusrite, among the others.
Another use for Dsp processors is not only to monitor the sound with the effects on, but also to record the sound itself with the effects applied, and under this point of view there's plenty of interfaces, especially for Guitar and Bass, such as the Line 6 Pod (click here for a dedicated article) and many other devices, that will apply to your sound an emulation of Amplifiers, Cabinets, Effects and so on, all without burdening on the computer's resources: let's not forget that some of these effect devices can be used as an Usb Audio Interface too!

- The Right Interface for The Right Job: When choosing an audio interface it's important to have clear in mind the main use we intend to do with it.
Recording: If we need to use our audio interface mainly for recording, we need to choose the one with the right amount of inputs for our instrument, for example if we need to record drums, we will need an interface with many mic preamps (possibly at least eight inputs, for kick, snare, hihat, 3 toms, and 2 overhead). Another interesting choice is a mixer that sends all the channels into separate channels of our DAW.
Then we need a good quality ADC (analog to digital converter) with a high dynamic range, at least 96 dB. A high dynamic range for the DAC (digital to analog converter) isn’t needed, because the audio interface is only used for recording.
Mixing and Mastering: For these tasks we will need instead a good quality DAC (digital to analog converter), at least 110dB of dynamic range: this is necessary since we want the result of our mixing to have the same headroom it had when we recorded it, plus a good mixing quality will help us in the Mastering Phase too.
Another thing we may need for mixing is the correct number of inputs and outputs, as we've already seen in the second part of this tutorial: if we have some hardware processor such as an equalizer or a compressor, we will need at least two inputs and outputs, and maybe some S/pdif connection will help too.
If we use it just for mixing or mastering, our audio interface for mixing won’t need a high dynamic range of ADC (analog to digital converter).

Finally, if you want to go more in depth with all the technical features of an audio interface check out this additional article about the audio interface specs to nerd out even more!

- Happy First Birthday Guitar Nerding Blog!!: With the conclusion of this three weeks long article we're celebrating the First Atoragon's Guitar Nerding Blog's Birthday!! Thank you to all the viewers, keep on supporting us, becoming fan on Facebook and sharing our links, commenting articles and videos and collaborating with your articles! We need your help us to becoming the no.1 resource site on Home Recording Tutorials around!

Btw: ATTENTION, Facebook Fans! Facebook now requires page owners to pay to promote updates if we want our content to be seen by more of our fans. If we don't pay to promote our posts, only about 10% of our fans receive updates on their Facebook homepage feed.
To keep RECEIVING ALL POSTS FROM US you have to open our page, hover the mouse on the "Like" button near the gear symbol. In the pop-up select "ADD TO THE INTEREST LISTS". Then create an interest list (Make a Name for your sites). Then when you select that interest list you will see ALL of our posts.
Rock On!

Atoragon.

CLICK HERE FOR THE PART 1/3 OF THIS TUTORIAL!!

CLICK HERE FOR THE PART 2/3 OF THIS TUTORIAL!!

Saturday, October 13, 2012

HOW TO CHOOSE THE RIGHT AUDIO INTERFACE (a guide for dummies) PART 2/3


CLICK HERE FOR THE PART 1/3 OF THIS TUTORIAL!!

CLICK HERE FOR THE PART 3/3 OF THIS TUTORIAL!!

Once we have seen the different types of connection of the various audio interfaces on the market, it's time to take a look at the main features that an audio interface should have, starting with the ADC-DAC conversion: what is it? It's the conversion from an analog signal to a digital one (usually in binary system), and the reverse operation.
This process is very important if we want to make music, since it's going to impact on the whole production, therefore a good conversion leads to a good digital representation of the wave, and the better the electronic components of our device are, the better the conversion will be.
Working in the digital domain, we need to have a final wave at a resolution of 16 bit and 44'100hz (the double of the highest frequency audible by a human ear), in order to be burned on an audio cd, but if we want to produce music that sounds really well on this device we need to operate at higher resolutions, and then Dither the signal down to that amount.

- RESOLUTION AND BIT DEPTH (click here for an in-depth article): This higher resolution basically consists into operating at a bit depth of 24bit (which is a fidelty to the original wave twice as high as the 16 bit one), and at a sample rate higher than 44'100hz, in order to have the freedom to create a wave that sounds better then it could be reproduced by a regular cd player, so that when it comes the time to dither it down to 16bit 44'100hz it will sound better than if it was recorded directly within those limits.
So when choosing an audio interface keep in mind that it should let you work at a bit depth of 24 bit at a sample rate of at least 48khz (some devices arrives even at 192khz, but I personally don't think that much is necessary: many plugins don't work properly at that rate, plus the wave files becomes bigger and bigger on our hard drive).

- INS AND OUTS: another important feature that we must analyze when choosing an audio interface is the amount of Ins and Outs. What do we need to do with this interface? Do we need to record our whole band or just guitars and vocals in our bedroom? We need to have a clear idea of how many inputs we need.

The Input - Output jacks are Mic inputs (balanced), Line Inputs (unbalanced), and Instrument Inputs: the Xrl jacks, or microphone jacks, are balanced jacks (signal level is higher, because it passes through a mic preamplifier), while the 1/4 jacks (also known as TRS) may be balanced or unbalanced (the unbalanced ones have a significantly lower signal level and are called Line Inputs).
Line Inputs: These TRS jack labeled "Line Input" are the ones optimized to receive sound from an external preamp, or an external mixing board, since this input bypasses the preamp section of the interface.
"Line Outputs" are instead used to send the signal to external outboards, like for example hardware effects processors, or other amplifiers, if we want to do a Reamping.
Instrument Inputs instead have a higher impedance (therefore a lower signal) than a balanced input, but the signal is higher than a line input; ideally these inputs stands halfway between a balanced jack and an unbalanced one in terms of signal, and are suited specifically for guitars, basses, and other instruments.
Most of modern audio interfaces anyway features one or more combo jacks balanced-unbalanced that automatically switch between the two formats recognizing the type of instrument, plus they often offer some other unbalanced input.

If we need to record a whole band there are interfaces with several Xrl or Combo balanced inputs, or even some mixer that can directly connect with the pc via Usb or Firewire, just make sure that if the mixer connects with the pc, you can track independently all the single channels on your Daw (an option possible, for example, with the Phonic Helix serie), because most of them will just sends all of them to a stereo output, making further mixing impossible!

Sony / Philips digital interface (S/PDIF), this input-output consists in two plugs: In (usually red) and out (usually white). This connection has many uses: to connect an external mixer to the interface, connect the interface to another interfaces or to studio monitors, to connect reproduction devices such as an audio cd player to the interface without significant signal degradation.
Midi input - Output: this is a kind of connection not featured in every audio interface, and it lets your keyboard, or hardware drum sampler, or any other midi-driven device to be connected with the computer and to record midi tracks;
lately this connection on the instruments is often replaced directly with an usb connection, so it is possible to plug the keyboard directly to the pc without the need of a Midi port.
ADAT Optical Input - Output: it's a pretty uncommon connection, featured usually on the upper-range interfaces, capable of carrying large amount of data without any additional digital to analog conversion. It may carry the data stream of up to eight digital audio channels simultaneously, so if we connect it to a device with more inputs, we can use this port in our interface to expand the number of channels streamed to our Daw.
Headphone Output: a headphone output or more is very important, and it features an internal headphone amplifier with volume control to make it loud enough even for a singer, so that he can hear the base while he's singing. If more outputs or more volume are needed, it is possible to add to those outputs additional headphone amplifiers.

Sunday, October 7, 2012

HOW TO CHOOSE THE RIGHT AUDIO INTERFACE (a guide for dummies) PART 1/3


Hello and welcome to this week's article! today we're going to talk about audio inerfaces, and how to choose the one that suits your needs!
Back in the day, like 20 years ago, professional audio hardware was very expensive, at the point that it was impossible for an amateur to buy a decent equipment in order to do a good home recording, but lately, more or less in the last five/ten years, the manufacturers have started producing an increasignly wide range of interfaces of good quality, at a reasonable price, that allows anyone to try to record their own music at home, and this is the reason why the internet is full of "bedroom producers", me included :)
Why do we need an audio interface? Because we need to send somehow the signal to the Digital Audio Workstation, and the internal mic preamp of our motherboard it's just not accurate enough to reproduce it with fidelity.

Now let's analyze the main characteristics of an audio interface, in order to choose properly, starting by the kind of connection with the pc:

- PCI: nowadays only few interfaces are Pci (the internals interfaces), and they are used mainly for their AD-DA conversion, usually associated with a mixer or an external preamp. Those are often the cheapest solution and usually are also the best in terms of latency. The amount of data transmitted is very large too, the only downside is that once you have installed it on a pc, with screws and everything, it stays there, so it's unconfortable to carry it around and install it on other computers. Plus it's not compatible with laptops, and the sound quality depends on the quality of the external preamplifier you will use. (example of Pci soundcard: the M-Audio ones) 

- USB: it's the most common connection and it is already featured on every computer, so nothing else is needed, just make sure that your audio interface is at least USB 2.0 (3.0 is even better, although currently I am not aware of interfaces ready to support it), otherwise it can't transport enough data to handle a medium-sized project, and for larger projects even the 2.0 version may not be enough (it carries 400mbit/s, but it's slower and less stable than a Firewire port), so it may give some latency problem. 
For most of projects, though, usb 2.0 it's ok, plus Usb interfaces are fairly cheap and produced by a large amount of manufacturers, so the price spetrum it's very wide too, ranging from the cheapest ones (like Behringer), to the most high-end and expensive ones, like the E-Mu or the RME
Beware of the sample rate, though, since the higher it is, the less tracks the interface can handle, since their dimension increases greatly at higher rates.
The price difference is because of the specs (that we will analyze in this same article) and the components quality, especially the the converters and the Mic Preamplifier quality. When the Preamplifier section is good enough, there is no need for an external preamp, therefore we can save some money.
Another important thing to keep in mind is that Usb devices are driven by the Cpu. That means that they will keep busy some cpu just to run, and this might be a problem if we have a large project and try to make some resource economy. 

- FIREWIRE: this is a connection that is alternative to the Usb one, and it's not featured on every motherboard (altough a firewire Pci card can be bought for around 10 bucks), it does not support hot plugging (you must connect the device while the computer is still powered off, otherwise it may burn your motherboard), and also the average firewire interface costs a little more than an Usb one, so why does many people (me included) prefers those to the Usb ones?
Simple: a Firewire port carries more data than an Usb one (around 400 and 800 mbit/s, there are 2 different Firewire ports), it's more stable and reliable, offers a lower latency even handling big projects, and most importantly it doesn't make your Cpu work just to be active, therefore you have more resources to use on your project. There are many firewire interfaces, some of which are considered a standard among the semi-professional scene because of their price-to preamp quality ratio, such as the Focusrite and the Presonus ones.

- THUNDERBOLT: it's a new kind of port introduced by Apple, it can carry 10 to 20 gb/s, and today there are just a few (and expensive) audio interfaces that can use it, such as Apogee and Universal Audio, but probably (along with the Usb 3.0 standard) this is going to become the standard that over time will replace the Firewire connection. It carries a huge amount of data, it's reliable and today it's featured on the latest generation of Mac computers.


Become fan of this blog on Facebook! Share it and contact us to collaborate!!

Sunday, September 30, 2012

HOW TO USE VIRTUAL CONSOLE EMULATIONS (with Free Vst Plugins Inside)


Hello and welcome to this week's article! Today we're going to talk about Virtual Console Emulation!
This article talks about a particular kind of plugin set between a Saturation Plugin, an Harmonic Exciter, a Mix Buss Compressor and an Equalizer. Looks complicated? It's actually easier than it seems, in facts, like we've already seen with our Virtual Channel Strips article, it's just all about recreating a sound that feels a bit less digital, and a little more like the vintage albums. 
Back in the day, in facts, recordings were done analogically, by processing the sound through huge and expensive consoles that, just by passing the signal through them, used to give to the wave a particular colouration, and this colouration, featured on some classic, timeless album, is still today sought after from many sound engineers.
This "Colouration" of the sound consisted basically in some characteristic of the electronic components used for the console, and at the beginning they were meant to be as transparent and hi-fi as possible, but nevertheless the sound was inevitably modified by passing through them to the point that, once a real hi-fi and true-to-the-source recording has been possible, the engineers felt something was missing.
When the Drive knob is raised, those Virtual Console Emulators basically works halfaway between a Harmonic Exciter and a Saturator, so they add a bit of gain and a sligh compression too, and the hi-pass and low-pass filter tries to set the sound on the coords of the ones created with the virtual consoles. 
Some of these plugins works as a Summing processor too: a summing processor is a tool that is used to sum together the tracks, not only by stacking and exporting them on a single file, but  
adding a slightly 'bigger' and more professional sound, although this is the source of much debate in the pro audio world, since always more audio engineers are sticking with the "In the box" solution without problems.

Here are the best Console Emulation plugins, ordered by price:

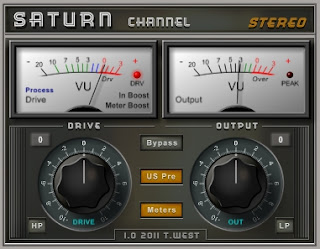
- Terry West's Saturn Console emulation: A Free console emulator for single channels or busses with fixed Hi-Pass and Low Pass filters, a warm gain-driven saturator with a option to use the fine US-pre gain compressor and two meters.

- Sonimus Satson: another good console saturation plugin, at an excellent pricing, with adjustable hi-pass and low-pass filter and gain control.

- SKnote Stripbus: Four types of console emulation, hi pass and low pass filter, VU meters, stereo buss compression and a very low price.

- Waves Nls: Three different console simulations (Neve, SSL, EMI), which will add different tonal colourations to your single instrument or mix buss and work as Summer.

- Slate VCC: another console emulation that features 5 classic console models, and features summing capabilities.

- Acustica Audio Nebula: an impressive virtual console emulator

Become fan of this blog on Facebook! Share it and contact us to collaborate!!

Saturday, September 22, 2012

HOW TO USE GATE and NOISEGATE (with Free Vst Plugins Inside!)


Hello and welcome to this week's article! Today we're going to talk about Noise Gates!
When we record an audio from a souce, a microphone or straight with the jack into the audio interface, we may have some unwanted noise, generated for example by the hum of the pickups (especially the single coil ones), the quality of the cable, and every other ring on the chain that brings the sound into the Daw.

Let's start by saying that there are different types of "noise": Hiss (which are the frequencies that produces sibilance), Hum (which is the low background noise), Clicks and Crackles (which are the snappy sounds sometimes presents when digitizing vynil recordings, or when a source goes into peak, distorting the signal) and the Ess frequencies, produces by the sibilance of the human voice.
The noisegate usually works by selecting the typical frequencies that we want to remove (for example the hiss frequencies, in the case of the DeHisser), and once they occour, heavily compressing them, lowering their level to silence. 
So we're talking about plugins that are both Equalizers and Gates (a Gate is a Compressor that works on the opposite way: when a signal is below a certain threshold, instead of boosting it, it brings it down to zero decibel).
Also Gates are used when recording an acoustic drumset, to remove unwanted bleed of other drum parts on a microphone (e.g. to remove the snare sound from the kick microphone).

Many commercial noisegates (like Waves, Sonnox or Izotope) features a "Learn" function: you play a part of the track where only the noise you want to remove is hearing, and the program will remove it from the whole track leaving the other frequencies untouched. This function is featured by some free plugin too, as you can see on the list below.

Focusing on guitar sound, the main issue here is the low background noise, or Hum, generated by the pickups and sometimes by the cable too. We need to clean the sound before entering in the amplifier, or, especially if we use the distorted channel, the noise will be distorted and amplified too, resulting in a strong hum and feedback.
If we are recording an amplifier by Microphoning it, we must use a Hum remover OR just manually cut away the silence parts that feature only noise, retaining the full harmonic richness of the played parts.
If we are recording straight to the interface using Virtual Amp Simulators, instead, we can use a Noisegate BEFORE the virtual amp, and before the eventual virtual Overdrive that boosts the amp.
Many DAWs today features a bundled Noisegate that eliminates the hum, but if your bundled noisegate is not good enough or if it's completely absent, here's a selection of the best free Noisegates:

FRETTED SYNTH GATE PLUS - a Noisegate with all the features of a Compressor.

GVST GGATE - One of the most used ones, very simple.

7AMP NOISE GATE - One knob gate with Learn function: you simple hold your guitar strings for a second, or keep your microphone in silence, allowing the plugin to study noise pattern, then you set filtering level.

REAGATE - the free Gate from the Reaper Daw

FLOORFISH - A versatile multi-purpose Gate, with Learn function.

- How to use a Noisegate to remove unwanted background noise or microphone bleed: Let's load a noisegate on the track we wish to "De-Noise", and set the Threshold control wery low, so that no signal is below it, and therefore there is no gating. 
Now raise the Threshold control until only the hum is gated, and adjust the attack and release control in order to decide how fast the Gate should kick in, and for how long it should be active. It's as simple as that, just remember, when you use it to clean up your guitar tone, to adjust it with your distortion on, or the hum will be almost inaudible.

Become fan of this blog on Facebook! Share it and contact us to collaborate!!

Saturday, September 15, 2012

THE BEST FREE VST GUITAR AMPS (a guide with free Vst plugins inside)


Hello and welcome to this week's article! Today we're going to talk about a long awaited topic: the best free guitar amp simulators, which ones are, where to find them, how to use them :)
First off let's put it this way: the last ten years have seen a very fast acceleration towards guitar amp modeling, with the release of increasingly accurate softwares that recreates hardware circuts, both solid state or Tube driven, that tries to recreate the final result in terms of sound. This effort to bring hardware processors to the digital domain has brought to the birth of digital amp modelers, both hardware (like the Line6 Pod, that we have already covered on This article) and software.

On the software side the scene is rapidly evolving, with the release always more accurate modelers, such as Peavey Revalver, which features the proprietary license of Peavey amplifiers, or Overloud TH-U and Bias FX, and the market is lately trying to explore the smartphone and tablet market too.
Those abovementioned products are commercial all-in one bundles that features an array of virtual amps, cabinets and stompboxes, but also in the freeware domain there is a wide range of quality software, developed by engineers that decides to share with the public domain community the results of their researches, often offering products that have absolutely nothing to envy to the commercial ones.
Here are the most used:


THE SERINA EXPERIMENT PLUGINS

TSE - X30 - Based on ENGL E530 Rack Mounted Amp Unit
TSE - X40 - A Hybrid between A Mesa Dual Rectifier and A Peavey 5150
TSE - X50 - A Peavey 5150 Clone

NICK CROW LABS (CLICK HERE FOR A COMPARISON VIDEO)

Nick Crow - 7170 Lead - A Peavey 5150 Clone
Nick Crow - 8505 Lead - A Peavey 6505 Clone
Wagner Sharp - A hi gain tube preamp simulator

Ignite Amps - NRR 1 - Great Sounding High Gain 3 Channel Amp
Ignite Amps - The Anvil - A VST version of the Amp designed by Andy Zeugs
Ignite Amps - Emissary - A beautiful looking and sounding amp, so powerful and versatile that it doesn't even need a booster
Ignite Amps - ProFET - my favourite one from this producer, the simulation of a solid state preamp, that with the right booster becomes excellent for heavier metal genres.

- PVTHP7 (VADIM TARANOV)

Clang - A simulator of Randall Satan
Jump - A simulator of a Peavey 5150
Megafuzzie - A simulator of a Mesa Boogie Mark IV
Mars JFD - A simulator of a Marshall AFD100
The NSB - A mix between a Peavey and a Dumble
JessieM X100 - A simulator of a Marshall JCM800 2204 50w
Lead E530 - A simulator of the Engl E530 lead channel
Andy Zeugs Anvil - A simulator of the Anvil preamp
Heavy Lead 5150 - A simulator of a Peavey 5150
Endl Fireball - A simulation of an Engl Fireball
Super Sonic - A simulation of a Bogner Ubershall
Pvthp7 - Peavey 5150 - The simulator of a Peavey 5150 head with snake skin tolex
Pvthp7 - Krank Revolution - A Krank Revolution emulation
Pvthp7 - Mesa Boogie Mark 3 - As the name says, a Mesa Boogie Mark 3 emuolation
Pvthp7 - Baron K1000 - a Baron K1000 custom head emulation
Pvthp7 - Randall Solar - an emulation of the Randall Satan, the Ola Englund signature head

This russian programmer also produces one free multiband noisegate called "3 Band Noisegate", also downloadable from the site.

Audiority:

L12X - a simulator of the Marshall Lead 12 solid state amp

- NALEX:

- Gerbert: a simulation of a Diezel Herbert (very suggested!)
- Uber: a simulation of a Bogner Ubershall
- Crunchman: a simulation of a Friedman head
- Ninja: a very hi gain original amp, no need of booster here!
- Pectifier: a simulation of a Mesa Boogie Dual Rectifier
- J800: a simulation of a Marshall JCM 800
- Valver: a simulation of a tube amplifier
- Rectifier preamp: a simulation of a Mesa Boogie Rectifier Preamp
- Schmitt - Octaver: a fuzz paired with an octaver

LEPOU PLUGINS (CLICK HERE FOR A COMPARISON VIDEO)

LePou - Lecto - Mesa Boogie Dual Rectifier Clone
LePou - LeGion - An original voiced amp by LePou, very popular in the DIY Djent world
LePou - Le456 - An ENGL Powerball Amp Clone
LePou - SoloC - A Soldano SLO100 Amp Clone
LePou - Hybrit - A Marshall Superlead/JCM800 Hybrid

ACME BAR GIG 

AcmeBarGig - C15 - A Very High Gain Amp
AcmeBarGig - Series 60 - An Original Voice amp, is supposed to replicate a "8000 Watt Head"
AcmeBarGig - Razor - An Original Voice Amp, capable of many different tones.
AcmeBarGig - Shred - A Full guitar amp suite, featuring 6 different amp models with interchangeable tone stacks (Engl, Mesa, Marshall, Vox, Krank, Fender).

There are also many other great, free, amps available from AcmeBarGig in their "Classic Hybrid Line."

NDZEIT

NDZeit - DirtHead - Sounds like some kind of Peavey clone but with a voice control that lets you shift the voicing from American to British, similar to what Blackstar have done with the HT series. It includes a Cab sim that we'd recommend you switch off.
NDZeit - TubeBaby - Pretty basic emulation but with different amp "types" including. American, British and Custom. It includes a Cab sim that We'd recommend you switch off.


- How to use these virtual amplifiers: the typical chain to use these Virtual Amp Modelers is the one we've already seen on the Basic Guitar Chain article:

NOISE SUPPRESSOR -> OVERDRIVE -> AMP SIMULATOR -> SPEAKER SIMULATOR ->SUBTRACTIVE EQ->COMPRESSOR->BOOSTING EQ

The Noise Suppressor will clean our sound from the hum of the pickup-cable etc, then the overdrive will be needed only if we need to boost the amplifier, giving it that extra "chug" required for modern metal tones, but if we don't need a sound that edgy we can skip it.
Then we need the Speaker Simulator to recreate the cabinet sound taken from a microphone, and then an Equalizer to filter the unwanted frequencies before they become Louder due to the Compressor, whose main use is to tame the lows. Finally, if we need to boost some frequency, we can add another Equalizer after the Compressor.

Comment if you wish to suggest more Virtual Guitar Amplifiers!


Become fan of this blog on Facebook! Share it and contact us to collaborate!!